Chapter 2 Your First Xcode + R Project
To use R’s C interface (vs just spawning a process to run R scripts via
Rscript or just R) we’ll need to wire up the R framework to an Xcode
project, which means we need to know what a framework is, where the R
framework lives, and how to tell Xcode how to work with the R framework.
Note that there is nothing wrong with Rscript shebanging an executable
R script and unless you really need something in Swift that R doesn’t
have the main point of these command line exercises is to get folks up
and running quickly without having to do some introduction to SwiftUI.
It is possible to create an installer that does both a custom R framework installation as well as the command line app (which we’ll eventually cover, though it’s an advanced topic).
Furthermore it’s also possible to just use the C maths part of R within Swift (which we’ll also do as an advanced topic).
2.1 The R Framework
To use R from Swift, we have to use the R Framework13 that gets installed when you install R on macOS.
What exactly is a framework? We’ll quote directly from Apple:
A framework is a hierarchical directory that encapsulates shared resources, such as a dynamic shared library, nib files, image files, localized strings, header files, and reference documentation in a single package. Multiple applications can use all of these resources simultaneously. The system loads them into memory as needed and shares the one copy of the resource among all applications whenever possible.
The R framework lives in the /Library/Frameworks/R.framework
directory:
## /Library/Frameworks/R.framework
## ├── Headers
## ├── Libraries
## ├── PrivateHeaders
## ├── R
## ├── Resources
## └── Versions
##     ├── 4.0
##     │   ├── Headers
##     │   ├── PrivateHeaders
##     │   ├── R
##     │   └── Resources
##     └── Current
In the above output, there are two different versions of R installed.
The Current entry in the listing is a symbolic link that points to the
active/default one and every other entry at that top-level is just a
symbolic link to resources beneath the Current symbolic link:
Headers -> Versions/Current/HeadersLibraries -> Versions/Current/Resources/libPrivateHeaders -> Versions/Current/PrivateHeadersR -> Versions/Current/RResources -> Versions/Current/Resources
There are many fun nooks and crannies to explore:
## /Library/Frameworks/R.framework/Versions/Current
## ├── Headers
## ├── PrivateHeaders
## │   ├── Defn.h
## │   ├── Errormsg.h
## │   ├── Fileio.h
## │   ├── Graphics.h
## │   ├── GraphicsBase.h
## │   ├── IOStuff.h
## │   ├── Internal.h
## │   ├── Makefile.in
## │   ├── Makefile.win
## │   ├── Parse.h
## │   ├── Print.h
## │   ├── R.h
## │   ├── R_ext
## │   ├── Rconnections.h
## │   ├── Rdefines.h
## │   ├── Rdynpriv.h
## │   ├── Rembedded.h
## │   ├── Rgraphics.h
## │   ├── Rinlinedfuns.h
## │   ├── Rinterface.h
## │   ├── Rinternals.h
## │   ├── Rmath.h0.in
## │   ├── Rmodules
## │   ├── S.h
## │   ├── Startup.h
## │   ├── config.h
## │   ├── config.h.in
## │   ├── rlocale.h
## │   ├── stamp-h.in
## │   └── vg
## ├── R
## └── Resources
##     ├── COPYING
##     ├── Info.plist
##     ├── R
##     ├── Rscript
##     ├── SVN-REVISION
##     ├── bin
##     ├── doc
##     ├── etc
##     ├── fontconfig
##     ├── include
##     ├── lib
##     ├── library
##     ├── man1
##     ├── modules
##     ├── share
##     └── tests
just be sure to look and not touch anything (unless you really know what you’re doing).
2.2 Using C from Swift
Apple has an entire topic14 on using native Swift syntax to interoperate with types and functions in C.
Apart from your own clever programming efforts, all the hard work/magic of this interoperability is enabled by something called a bridging header15.
Whenever we first create a new non-Swift language file (in this case
we’ll be using C) in Xcode we’ll be prompted to allow Xcode to create a
bridging header and install some build settings so that
LLVM16 (the toolchain Swift is based on) can treat C
libraries and frameworks as something called “modules”17
which are a more modern (and safe) alternative to the traditional
#include macro preprocessor hellscape (but are not without some
“gotchas” of their own, which we’ll run into fairly quickly).
Before we wire up R, let’s lay the foundation for this C bridge by
creating a new project — for practice and to avoid creating files
and directories with mixed case and spaces in their names (they work,
but they’re a pain even in smart shells) — named secondr (just
follow the steps in the previous chapter).
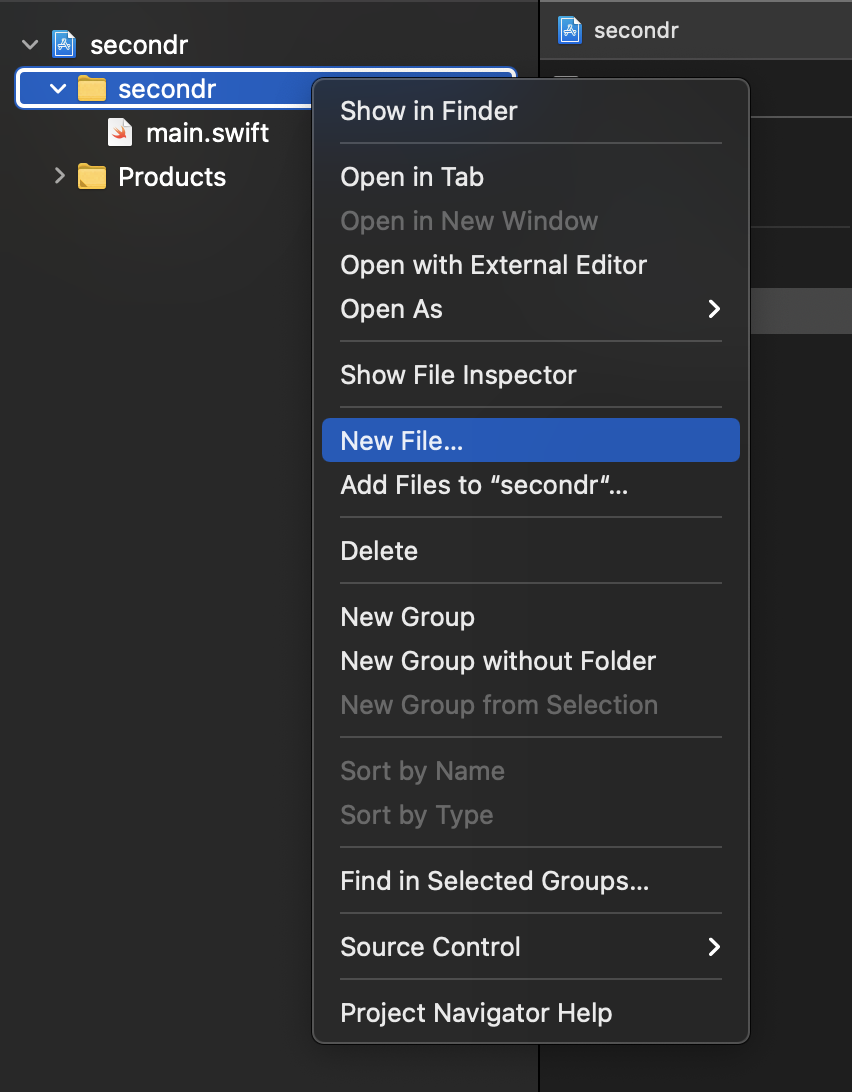
Once you’ve got secondr setup, right-click on the secondr folder
icon and select New File…:
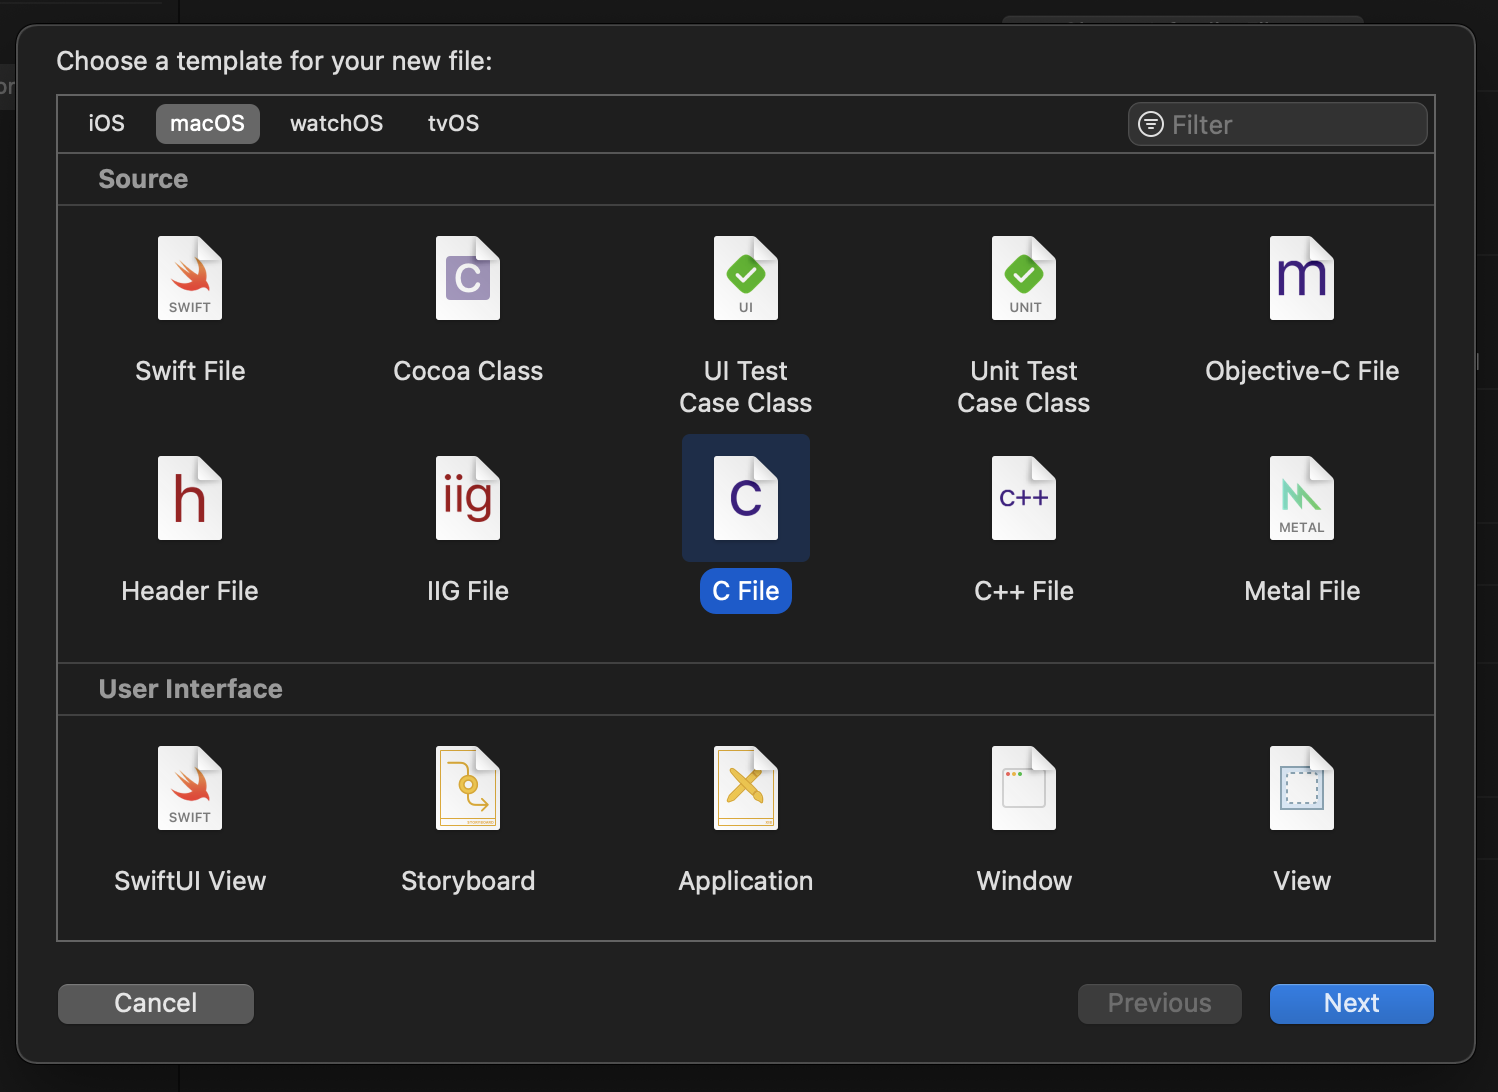
Choose “C” and select Next:
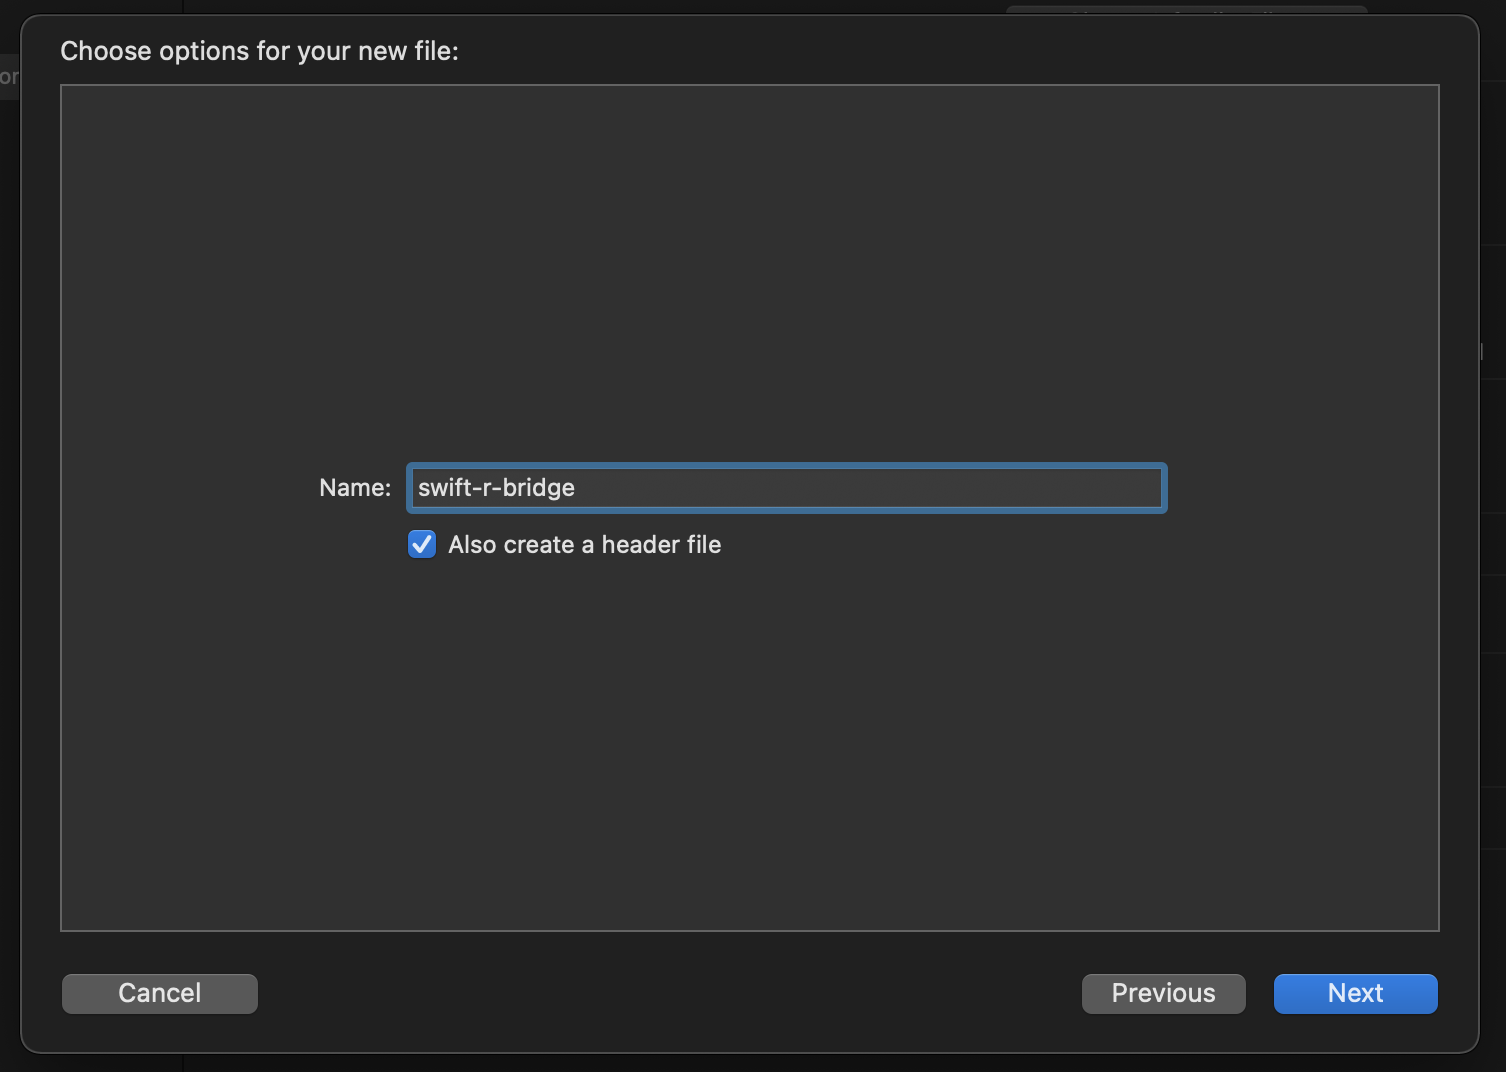
Give it the name swift-r-bridge and let Xcode create a header file for
it (note this is not the bridging header mentioned above).
Proceed to the next dialog where you’re asked where to save it (it will be in the right place so don’t navigate anywhere) and when you’re prompted to create a bridging header choose “Create Bridging Header”:

Your Project Navigator will now show four source files:
main.swiftsecondr-Bridging-Header.hswift-r-bridge.cswift-r-bridge.h
and the secondr build Target will have a new customized Swift Compiler
— General setting for the bridging header:

plus Xcode will have automagically added the need to compile our C code to the Compile Sources build phase:
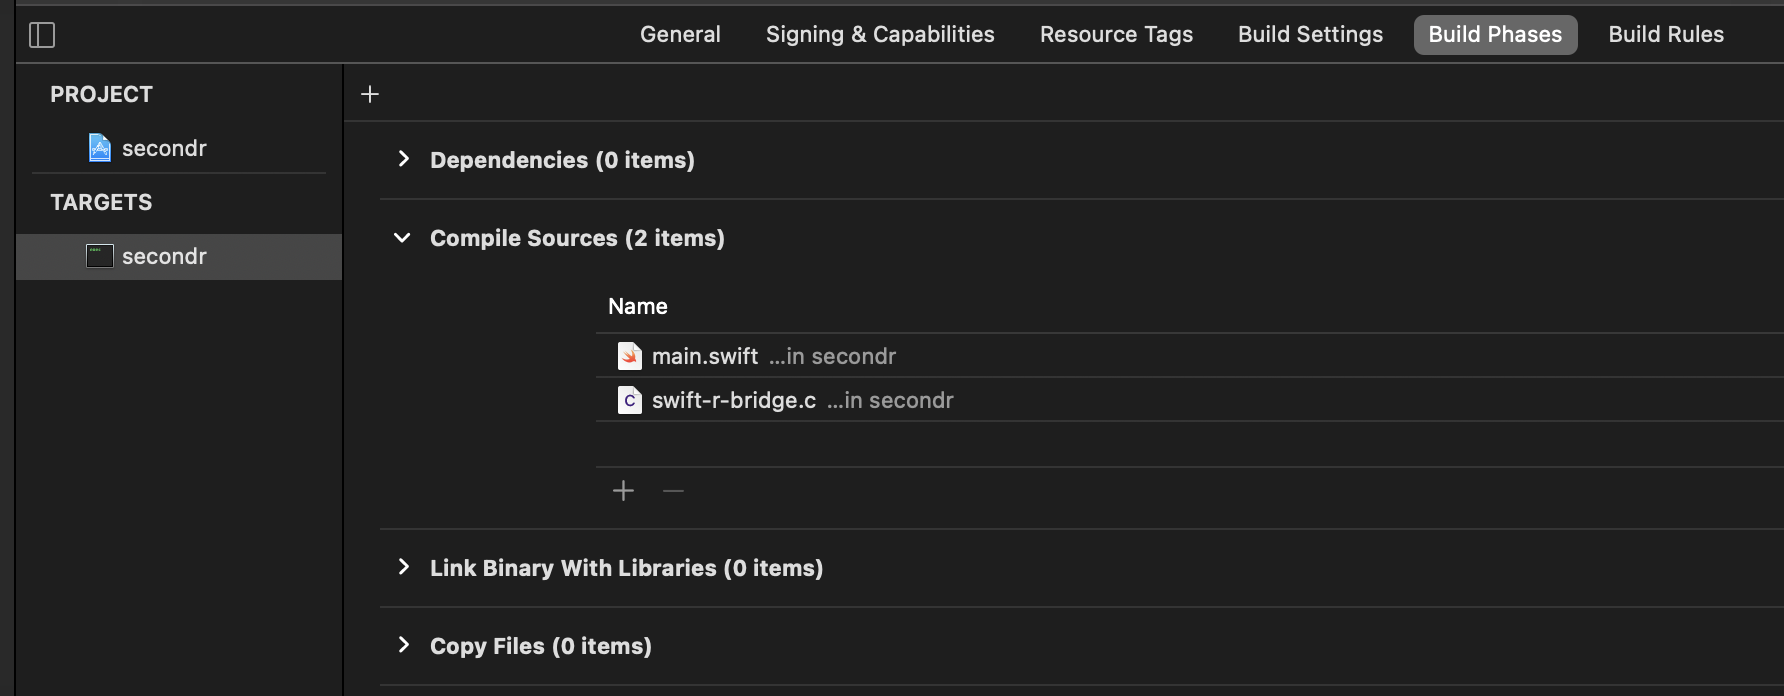
We have no real code in the C or header files but you can run the project now just to make sure all this plumbing is in place properly and you should still see the familiar “Hello, World!” output.
2.3 Wiring Up the R Framework
Now we need to tell our project about R. To do that, we need to head
over to the secondr target General settings:

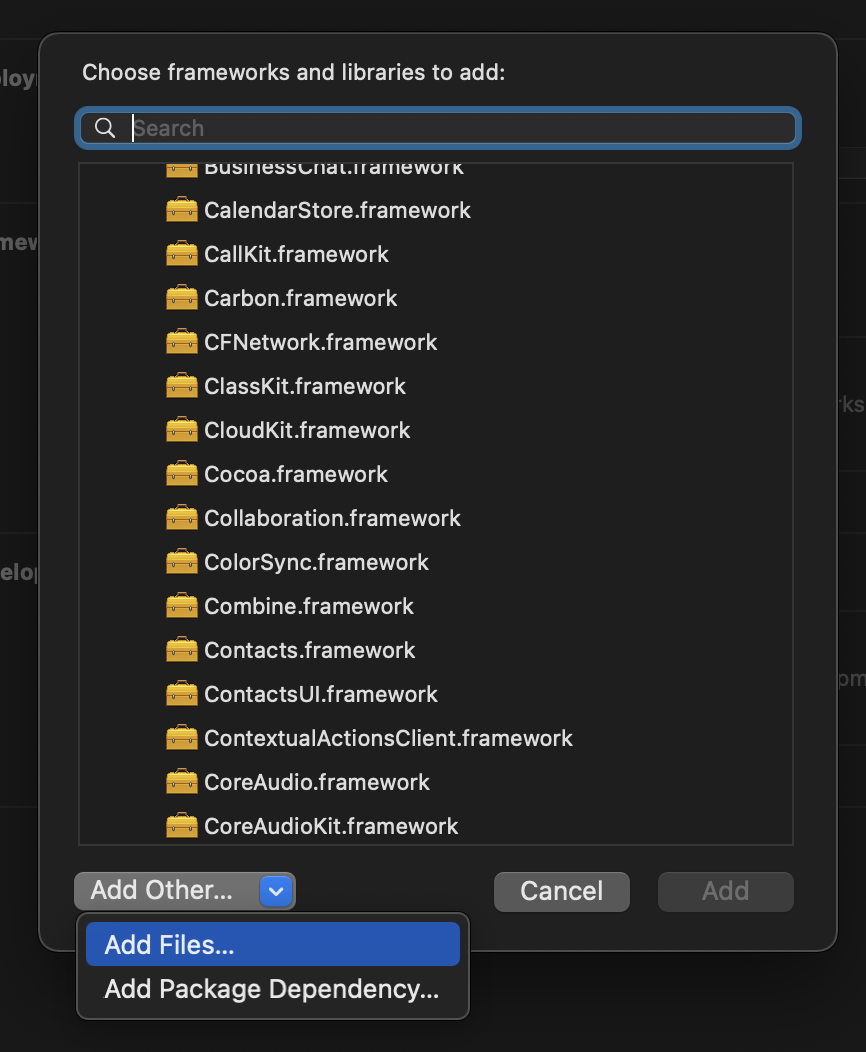
and hit the + within Frameworks and Libraries and choose “Add
Other…” then “Add Files…”:
then navigate to /Library/Frameworks/R.framework:
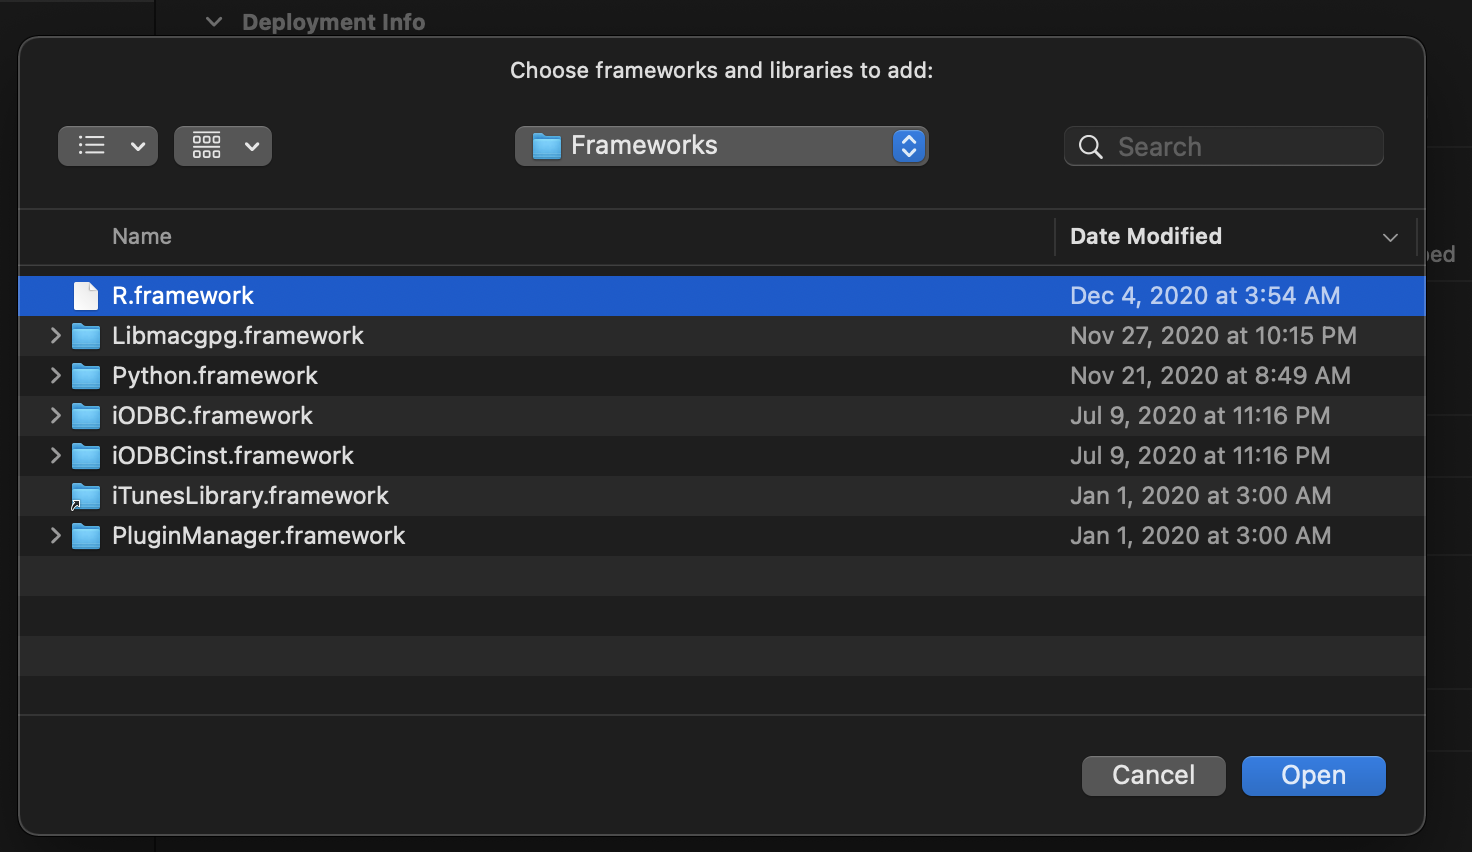
and select “Open”.
Now, under “Embed”, choose “Do Not Embed” (we’ll discuss “embedding” later in the book).

We’re almost done! We’re at the point where Swift will be able to talk
to R once we #include some R headers. Before we do that, we need to
tell Xcode where to look for these headers (unless you enjoy typing
egregiously long fully-qualified path names).
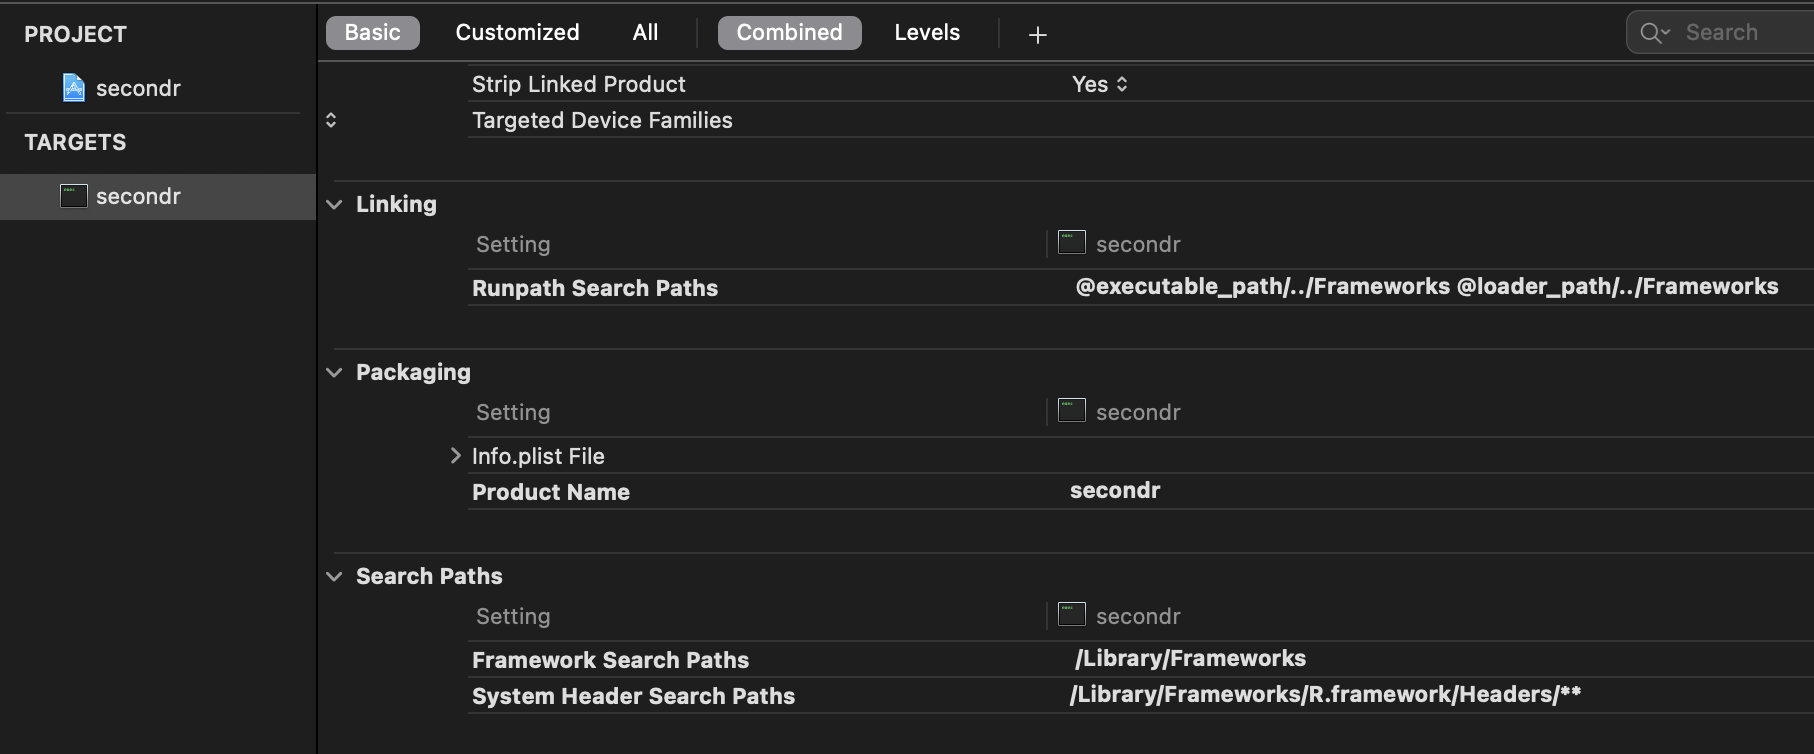
Navigate to the secondr target build settings and ensure “Basic” is
selected. Scroll down until you see “Search Paths” and add an entry for
“System Header Search Paths”.
Make swift-r-bridge.h look like this:
#ifndef swift_r_bridge_h
#define swift_r_bridge_h

#include <R.h>
#include <Rinternals.h>

#endif /* swift_r_bridge_h */
and then make secondr-Bridging-Header.h look like this (keeping the
comments in there as a reminder of what this file is for):
//
// Use this file to import your target's public headers that you would like to expose to Swift.
//
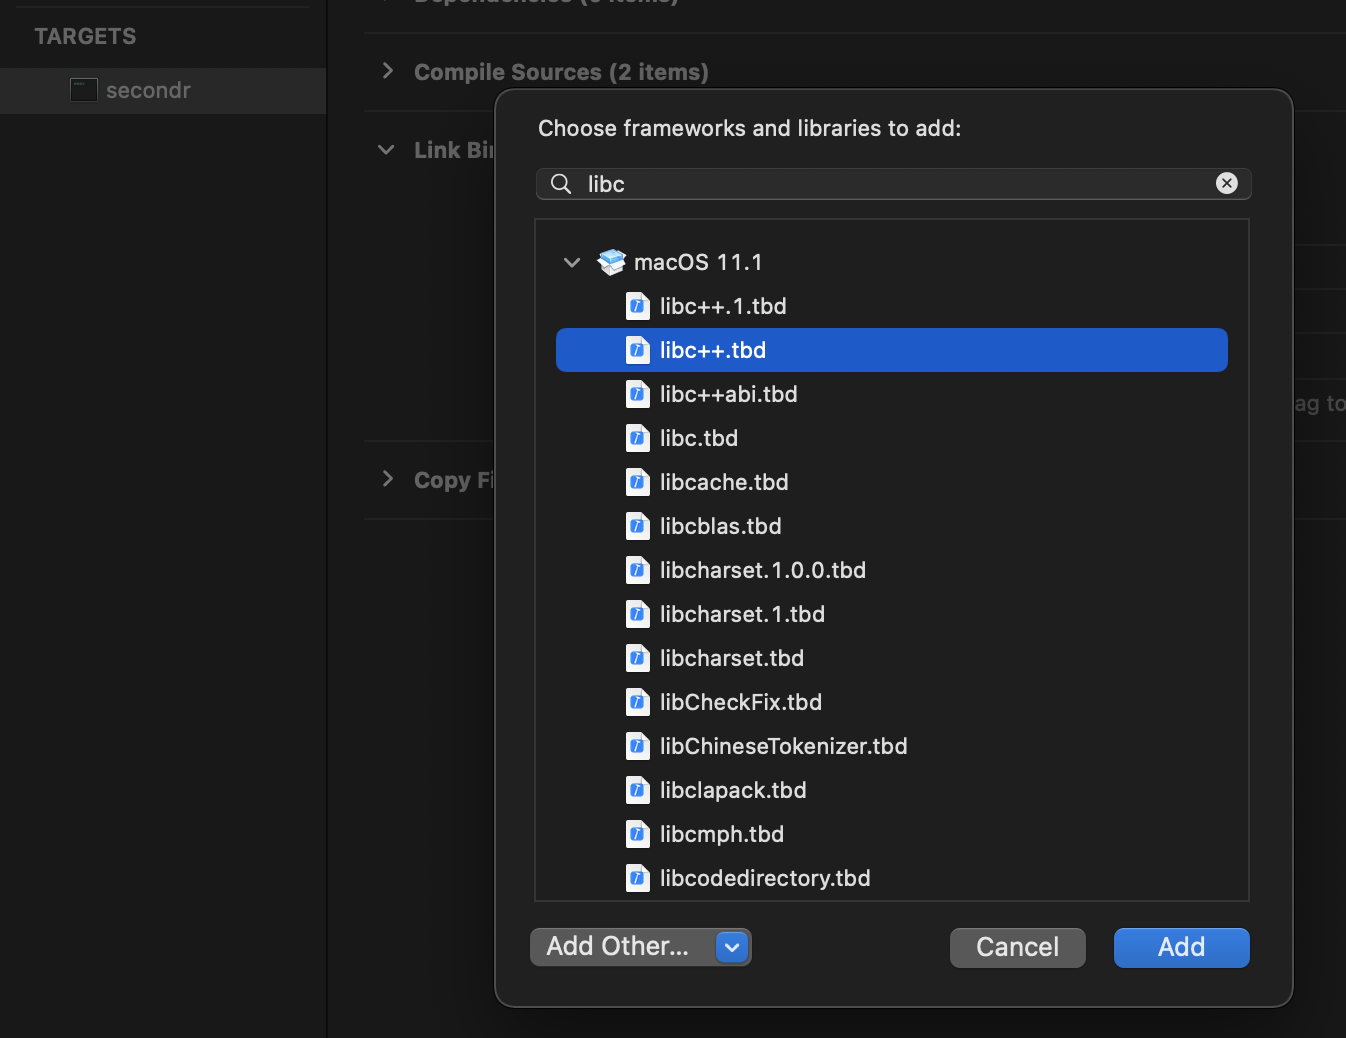
#include "swift-r-bridge.h"Since R uses the C standard library, we also need to tell Xcode to make
sure we link against it, too, so navigate to the secondr target Build
Phases, expand the Link Binary With Libraries and hit “+” to add the
libc++.tbd which can be fast-found via the search box:
Test a run of the project again (even though we’ve added no R code).
We’ve made a few file changes so now is a good time to save a known-good
starting place. Right click on the secondr folder in the Project
Navigator and choose “Source Control” -> “Commit 3 Files…”:
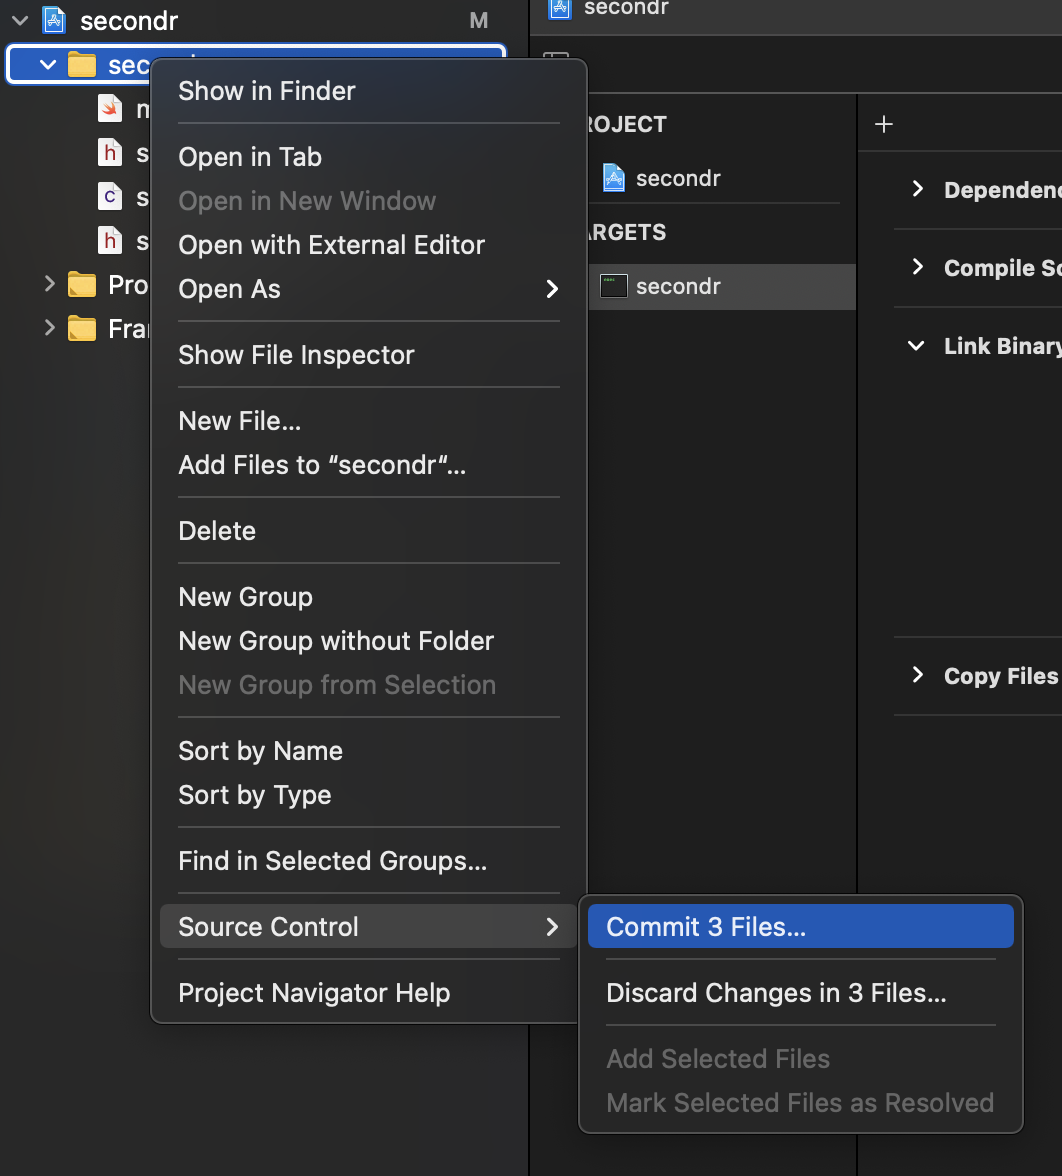
Give it a useful commit message when prompted and then consider making a backup or archive of the entire project folder since you’ll be able to use it as a template for future projects — like the one in the next chapter — and will help you avoid much of the clicking you had to do in this chapter.
2.4 Setting Up Embedded R
We’re technically “embedding” R into our application, and there’s a section on that in Writing R Extensions18 along with some embedding examples from R Core in the R source tree19.
Dirk Eddelbuettel (of {Rcpp} and other fame) also has some idioms we could follow in his {RInside} package20.
If you’re not familiar with embedding R in regular C programs you should take some time to read through the above before continuing.
We’ll create an embedded R initialization helper in C because it’s less cumbersome than the pointer machinations one has to go through in Swift.
Make swift-r-bridge.c look like this (ignoring Xcode errors that may
show up):
#include "swift-r-bridge.h"

void initEmbeddedR() {
  if (!getenv("R_HOME")) setenv("R_HOME", "/Library/Frameworks/R.framework/Resources", 1);
  char *argv[] = { "swiftR", "--gui=none", "--no-save", "--silent", "--vanilla", "--slave", "--no-readline", "" };
  Rf_initEmbeddedR(7, argv);
}
Now make swift-r-bridge.h look like this:
#ifndef swift_r_bridge_h
#define swift_r_bridge_h

#define USE_RINTERNALS

#include <R.h>
#include <Rinternals.h>
#include <Rembedded.h>

void initEmbeddedR(void);

#endif /* swift_r_bridge_h */
And, finally, make main.swift look like this:
import Foundation

initEmbeddedR()

print("Hello, World!")

Rf_endEmbeddedR(0)
Build/run the product and we should see the familiar (but still printed via Swift) “Hello, World!” output.
We just have one more step to go.
2.5 “Gotcha” #1: Variadic C Functions
In a regular C+R setup we could just #include <R_ext/Print.h> and then
call Rprintf() with a string of our choosing. If you try it in Swift,
you’ll see that it won’t work because Rprintf() is a variadic
function, meaning it takes an arbitrary number of parameters (a bit like
... in R).
We’re still going to use Rprintf() but we’ll create a helper function
in C to do so.
Make swift-r-bridge.c look like:
#include "swift-r-bridge.h"

void initEmbeddedR() {
  if (!getenv("R_HOME")) setenv("R_HOME", "/Library/Frameworks/R.framework/Resources", 1);
  char *argv[] = { "swiftR", "--gui=none", "--no-save", "--silent", "--vanilla", "--slave", "--no-readline", "" };
  Rf_initEmbeddedR(7, argv);
}

void printFromR(const char *message) {
  Rprintf(message);
}
Then make swift-r-bridge.h look like:
#ifndef swift_r_bridge_h
#define swift_r_bridge_h

#define USE_RINTERNALS

#include <R.h>
#include <Rinternals.h>
#include <Rembedded.h>
#include <R_ext/Print.h>

void initEmbeddedR(void);
void printFromR(const char *message);

#endif /* swift_r_bridge_h */
And, finally (for real!), make main.swift look like:
import Foundation

initEmbeddedR()

printFromR("Hello, World! (from R)\n")

Rf_endEmbeddedR(0)
Build/run the product and you should see our R-augmented greetings to
the planet. Note that Swift is smart enough to give a pointer to a C
string (from the Swift string) when it sees const char * parameters.
2.6 Up Next
Now that we’ve got a complete setup that can work with R’s C interface from Swift we’ll begin a multi-chapter process of building a command line tool to compute sunrise and sunset times from a combination of R packages.
Before diving in, look at the definitions and use of
int R_system(const char *)const char *R_ExpandFileName(const char *)Rboolean StringFalse(const char *)Rboolean StringTrue(const char *)Rboolean isBlankString(const char *)
in the header files in /Library/Frameworks/R.framework/Headers since
they all take simple const char * parameters like the function we
made. Try to figure out how to gain access to those functions (you may
need to include other R headers in your bridge) and then try work with
the result of Rboolean calls.
Remember, code examples can be found on GitHub21.
Framework Programming Guide: https://developer.apple.com/library/archive/documentation/MacOSX/Conceptual/BPFrameworks/Concepts/WhatAreFrameworks.html↩︎
Imported C and Objective-C APIs https://developer.apple.com/documentation/swift/imported_c_and_objective-c_apis↩︎
Importing Objective-C into Swift https://developer.apple.com/documentation/swift/imported_c_and_objective-c_apis/importing_objective-c_into_swift↩︎
The LLVM Compiler Infrastructure https://llvm.org↩︎
clang Modules https://clang.llvm.org/docs/Modules.html↩︎
Writing R Extensions: Embedding https://cran.r-project.org/doc/manuals/R-exts.html#Embedding-R-under-Unix_002dalikes↩︎
R source: Embedding https://github.com/wch/r-source/tree/trunk/tests/Embedding↩︎
SwiftR Book Examples https://github.com/hrbrmstr/swiftr-book-examples↩︎