Chapter 1 Your First Xcode Project
1.1 Hello, World!
Now that you have an Apple Developer account and Xcode installed, fire
up the Xcode app and hit ⌘⇧N to bring up the New Project dialog.
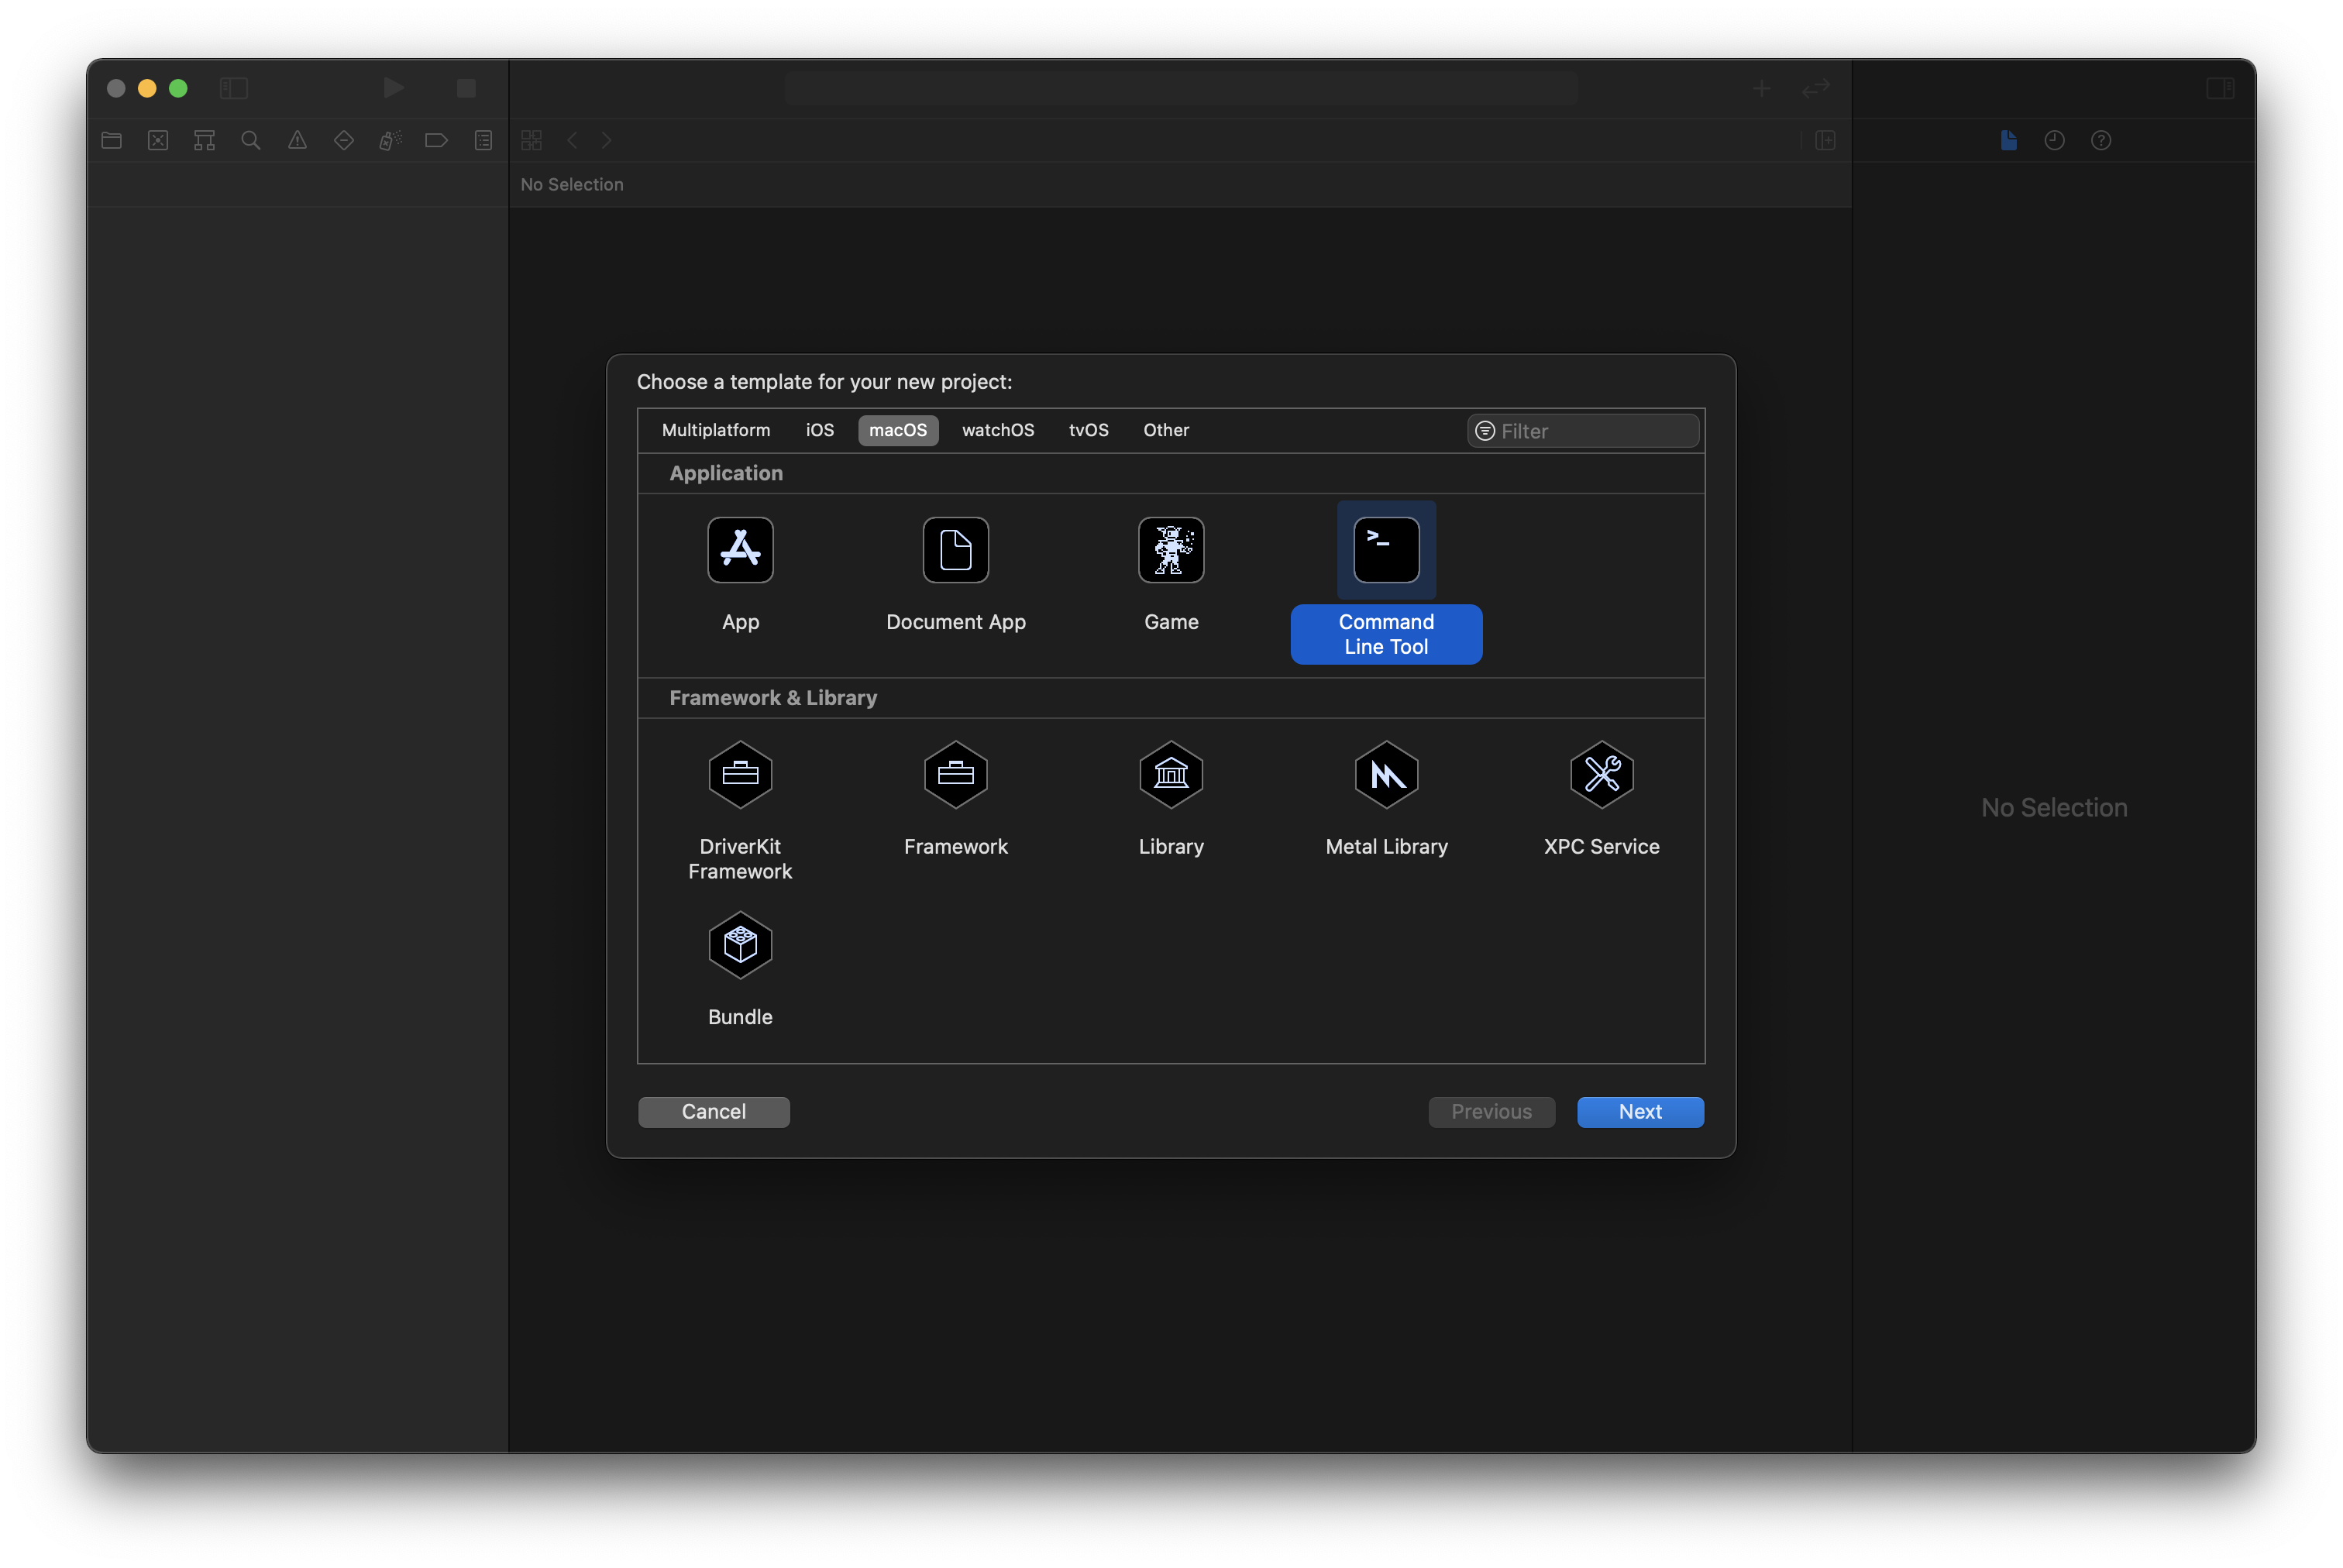
Select “Command Line Tool” and select Next
Now give your project (and “product”) a name. We’ve used “First R” in
the example below and ensure the language is set to “Swift”. Select
Next when done.

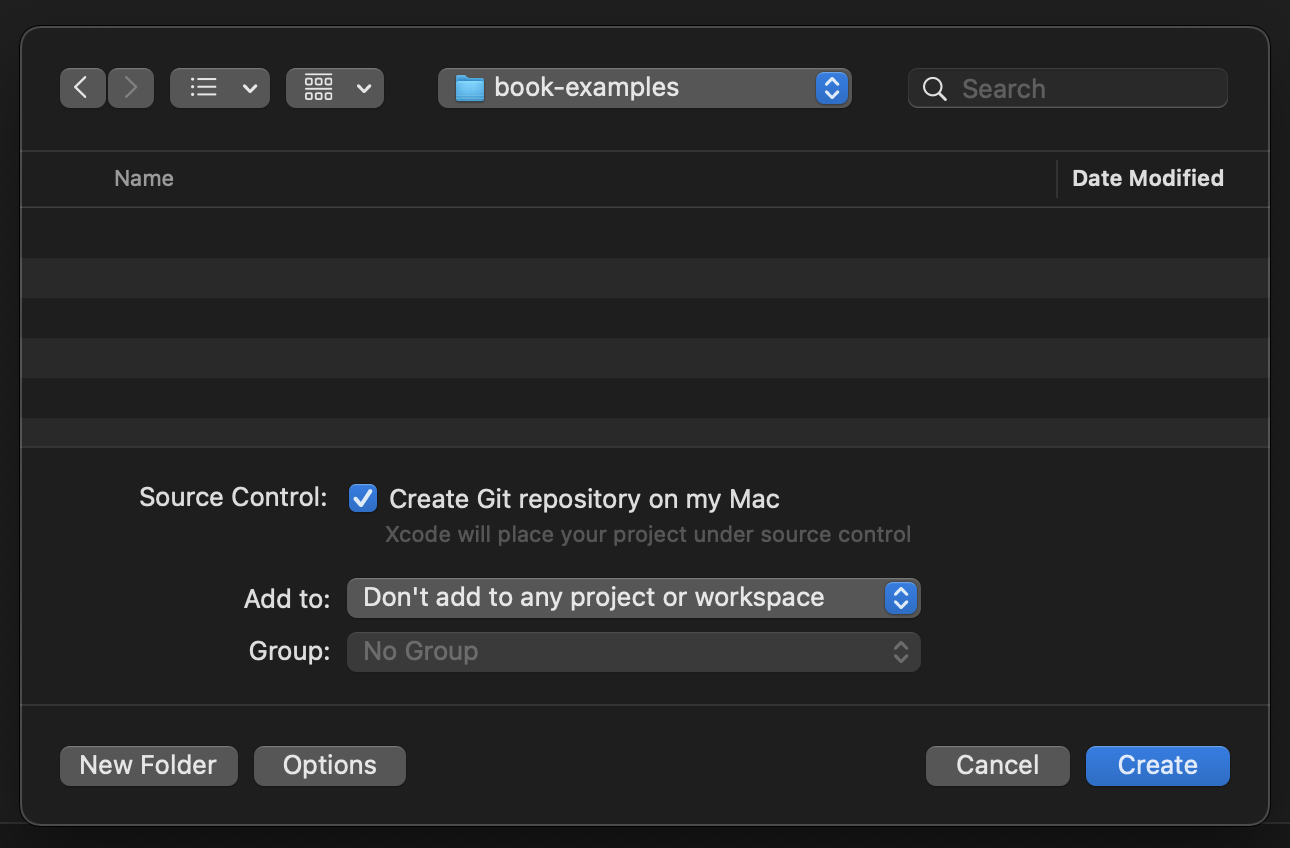
Now pick a directory to create a new project folder in. Using git for
version control is highly recommended. For now, don’t worry about the
other settings and select Next.
You should now be greeted with a fairly complex and daunting (if you’ve never worked in Xcode before) window with a crazy amount of options/settings.
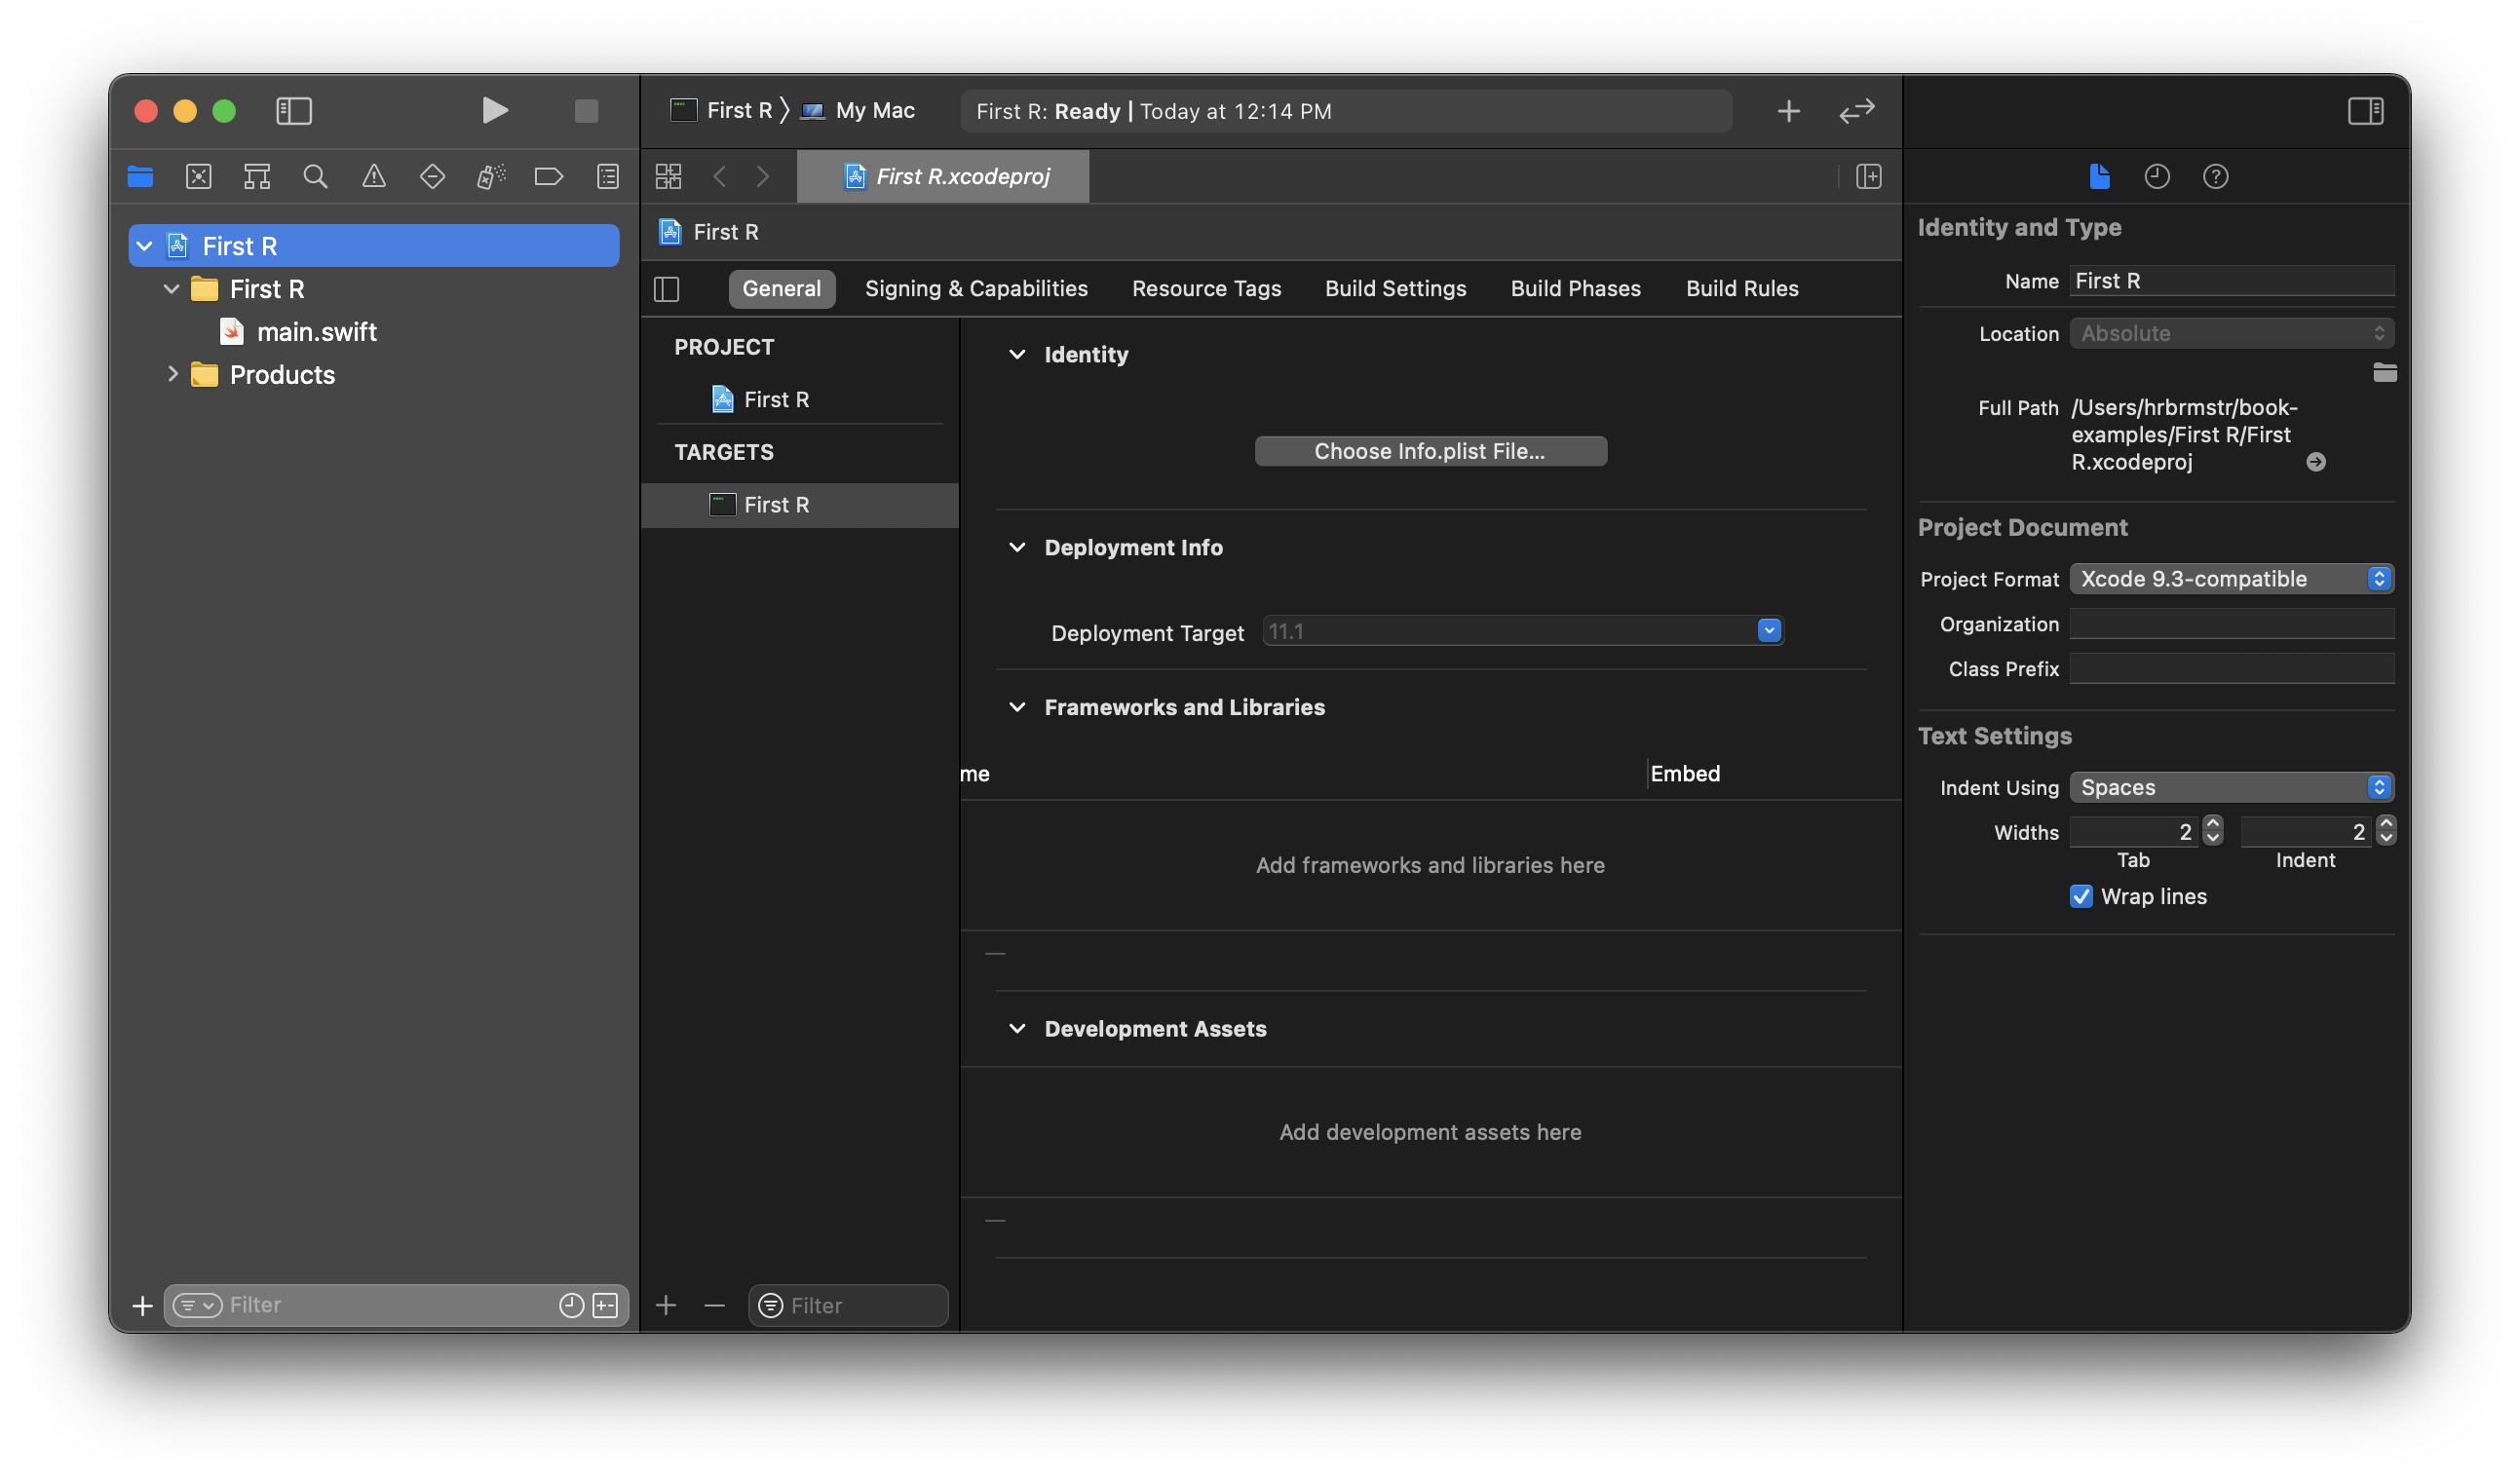
You can drag the right-most slider all the way to the right — or select the icon in the upper-right-most part of the window — to close inspector pane.
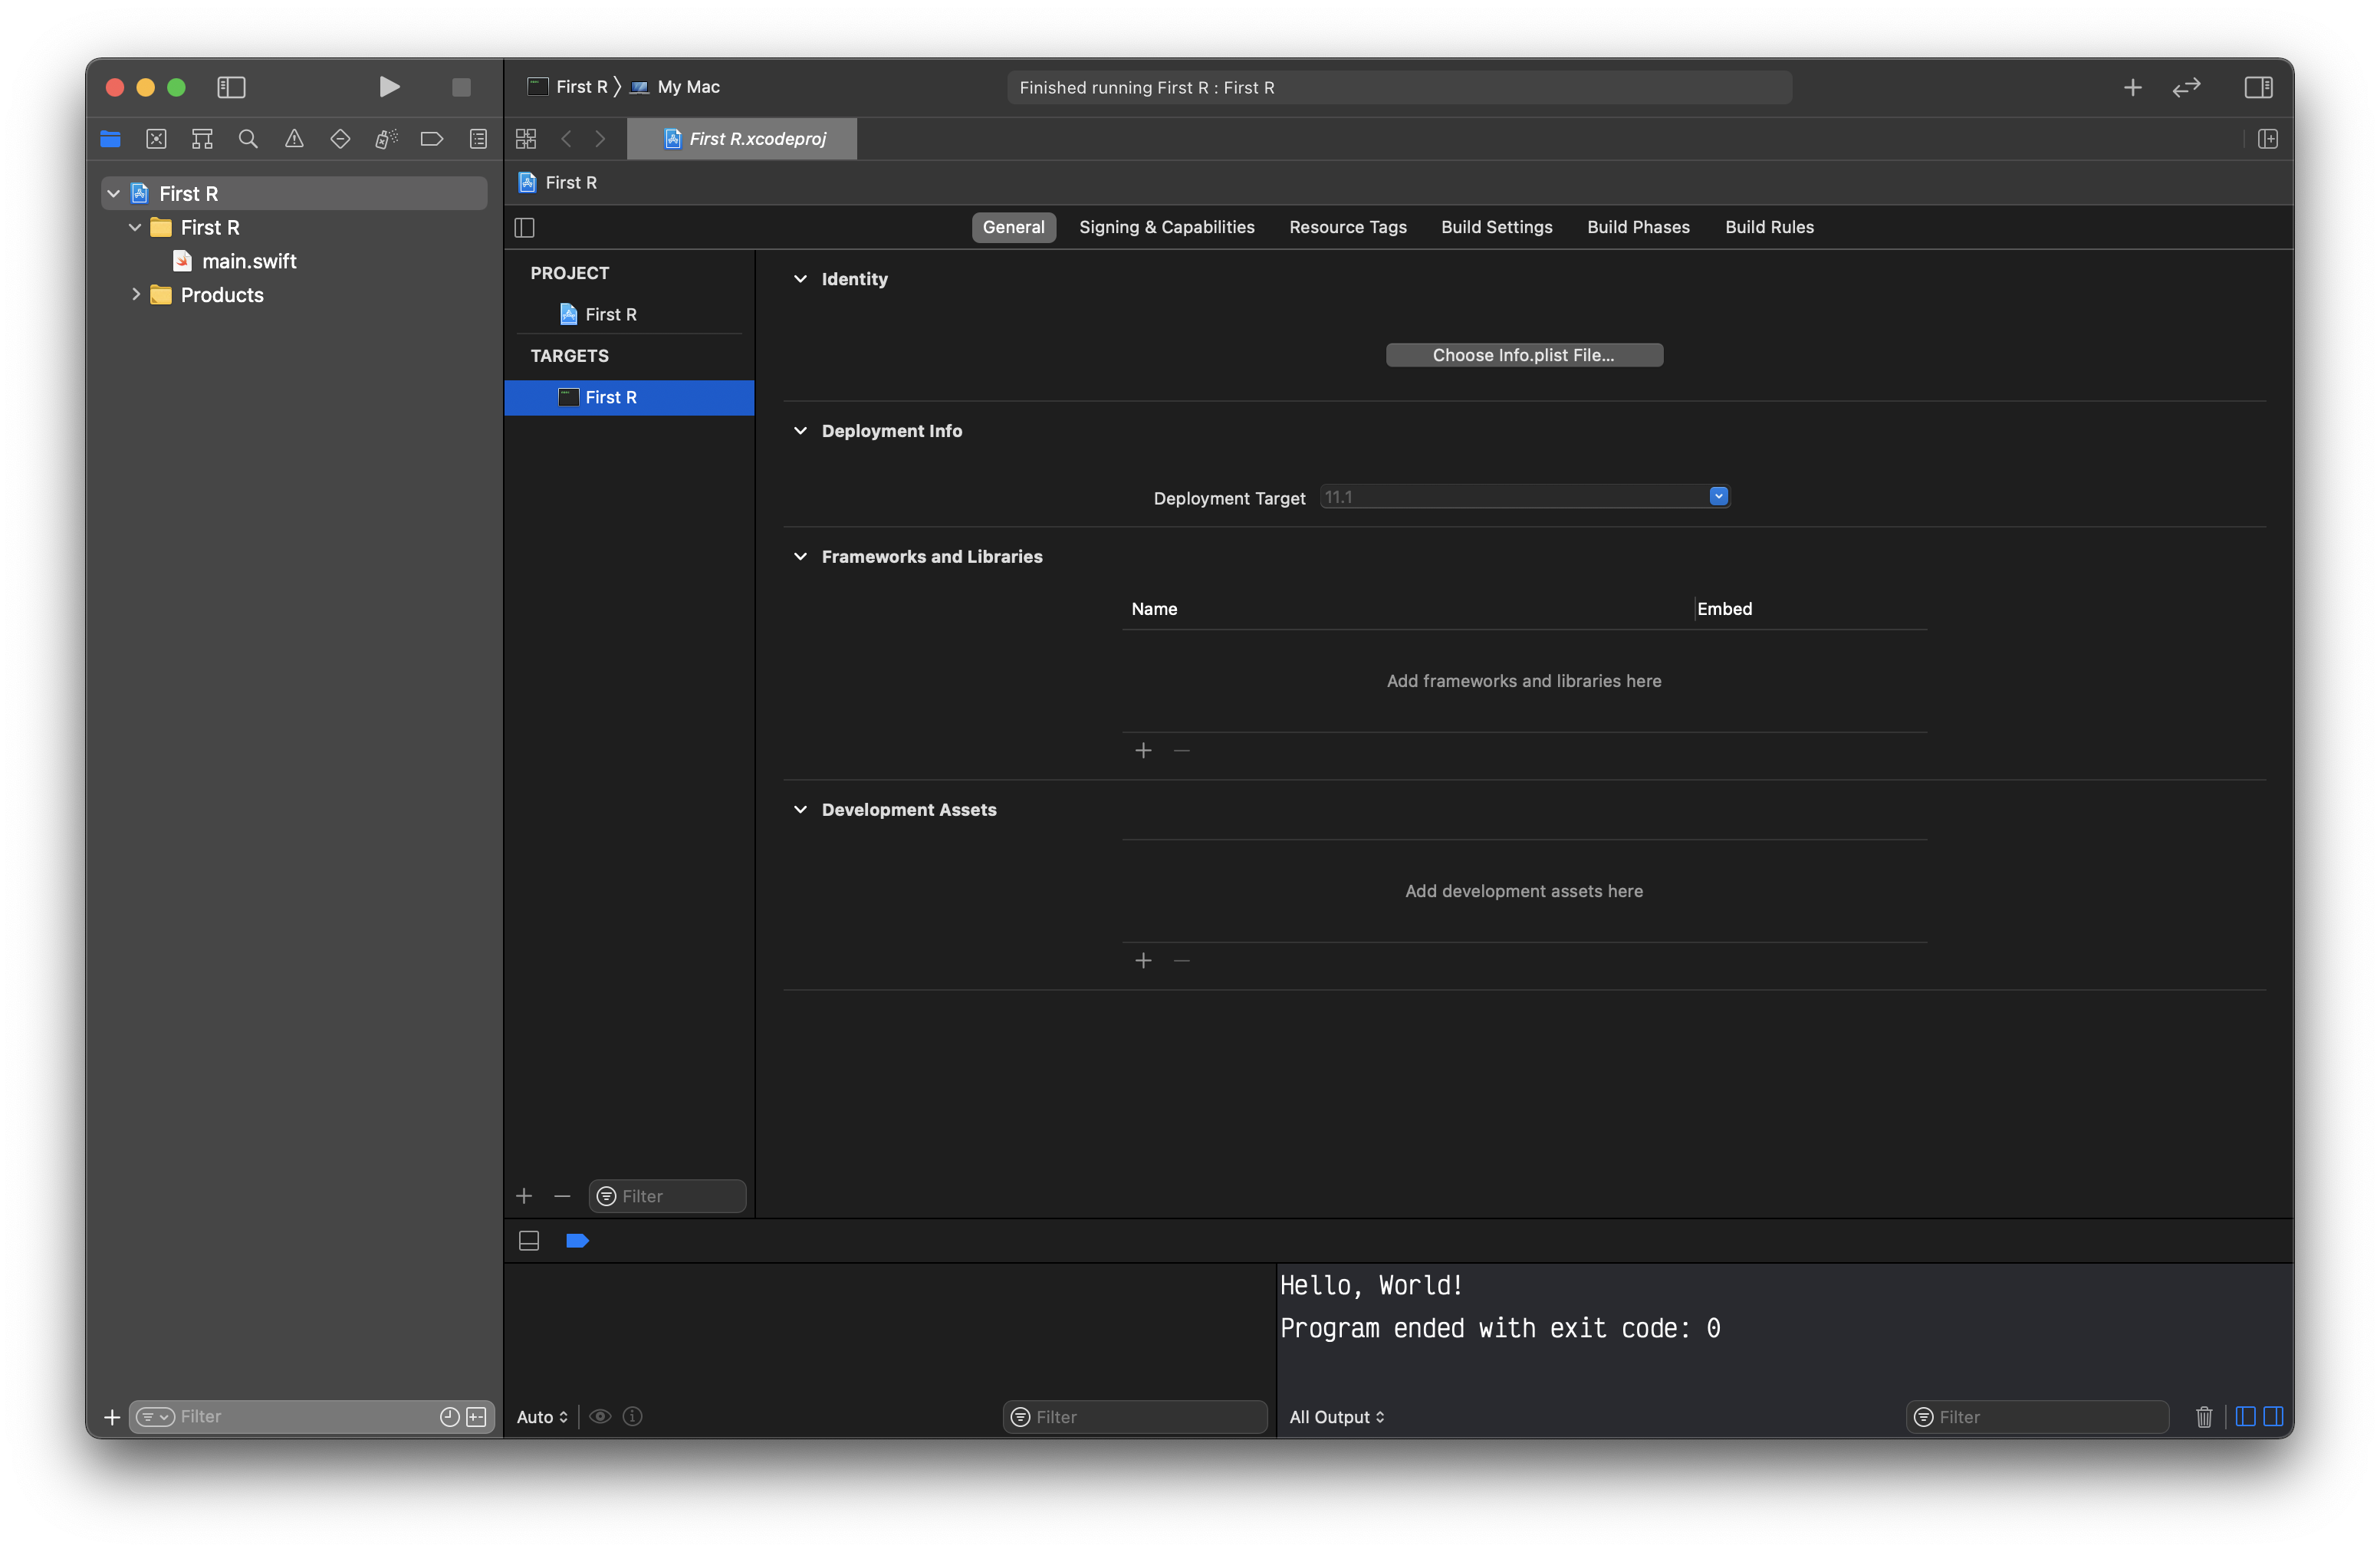
To make sure everything is working, run the boilerplate project code by
using the key sequence `⌘R or selecting Product->Run from the Xcode
app menu. You should see “Hello, World!” output in a small console
window that should automatically pop up on you:
If that worked, take some time to explore the Xcode project interface
and eventually navigate to the main.swift file in what Apple calls the
Project Navigator. Change the “Hello, World!” text, add new print()
calls, and — with the Swift Basics9 handy
in a browser tab — try working withe Swift’s core types and print some
variables you create and manipulate to get a feel for the edit/build/run
process.
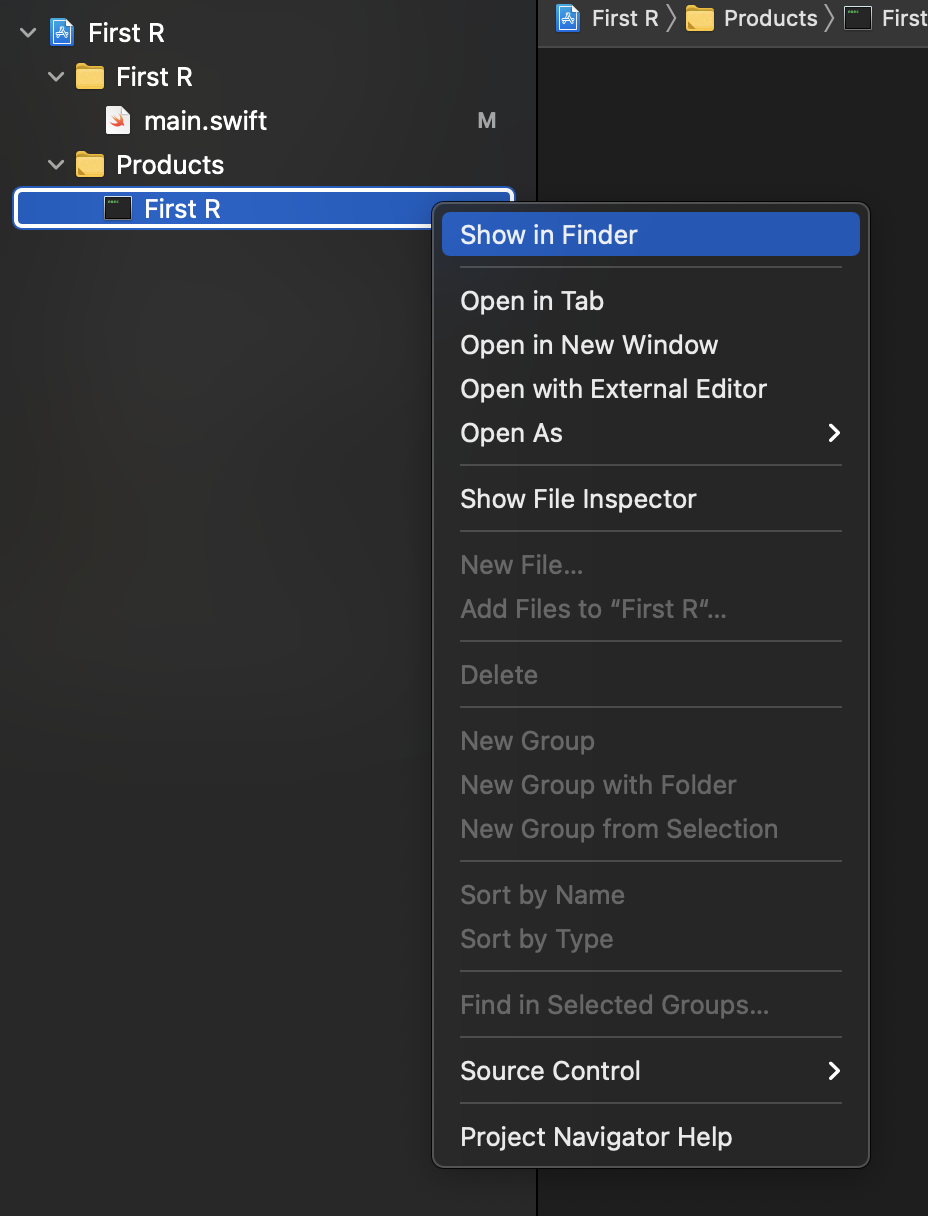
Now, we’re building a command line app which means we (thankfully) won’t have Xcode around to run the finished product. To find out where it is, show the location of the built product in the Finder:
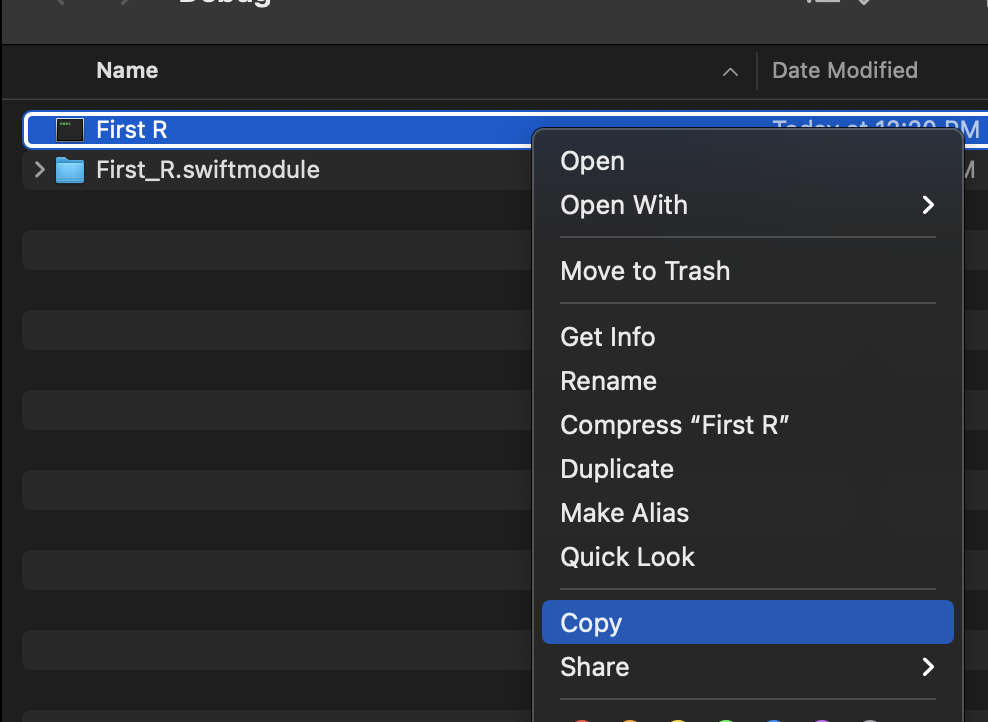
Then copy the full path of the executable:
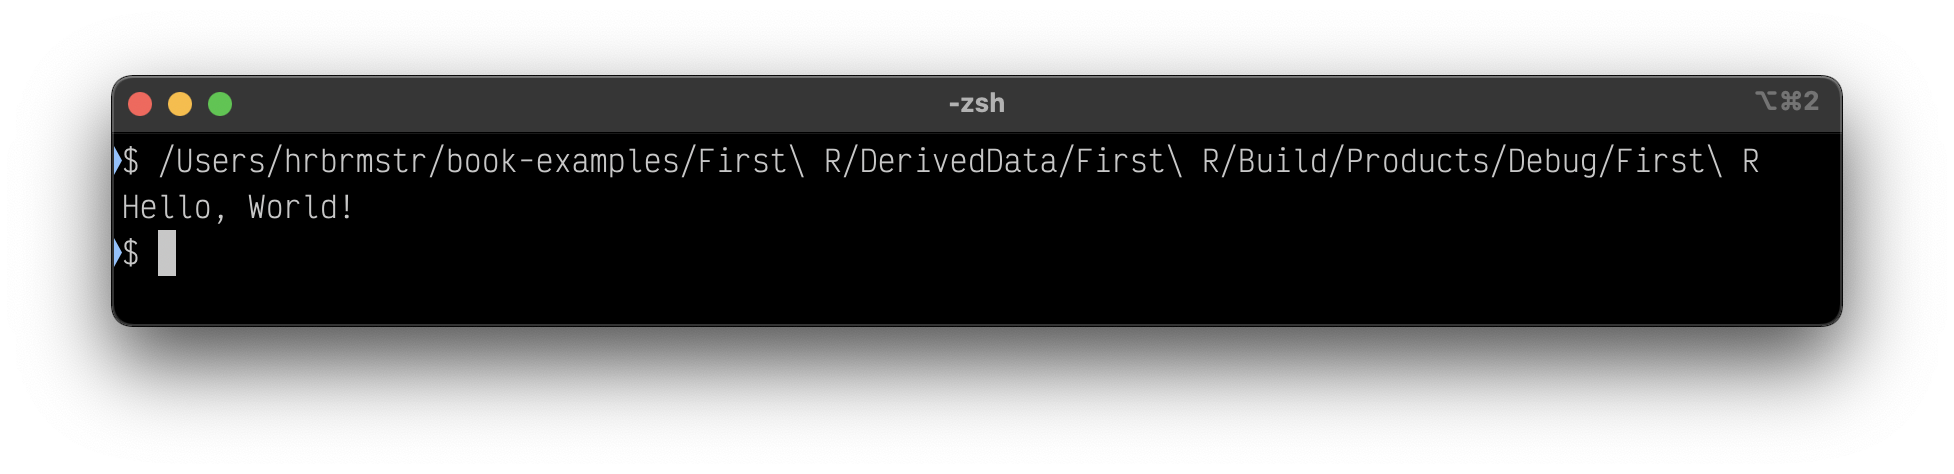
and execute it from Terminal.app or
iTerm10.
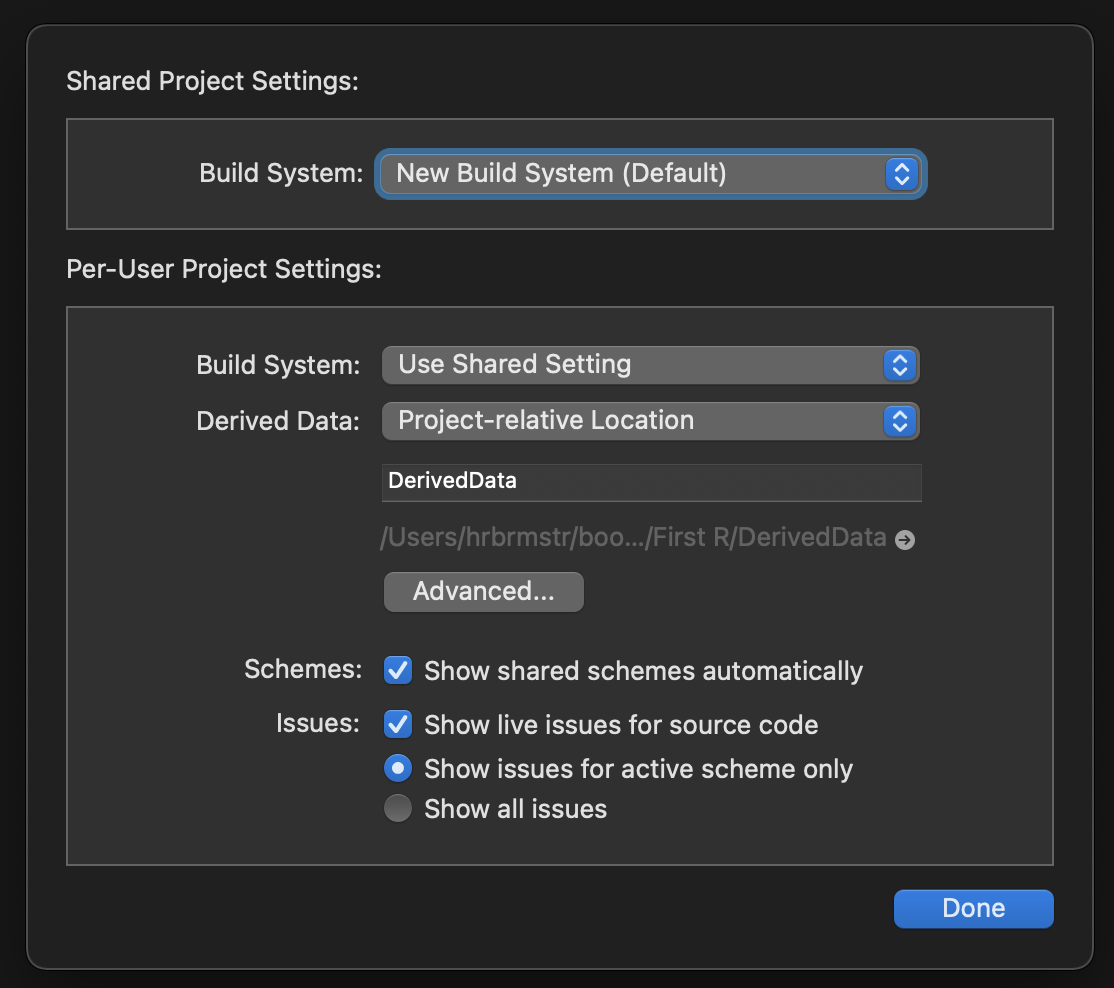
If your DerivedData directory (where the build system does all the
hard work and eventually stores compiled products/apps into) isn’t in
the same folder as your project, go to File->Project Settings… and
change the Derived Data: setting to “Project-relative Location”, then
rebuild the project.
1.2 Building Products from the Command Line
If you prefer working from the command line, you can use the
xcodebuild command line tool to do pretty much anything you can do via
the Xcode GUI.
At a terminal prompt, cd into the folder with the First R.xcodeproj
and list the available targets:
$ xcodebuild -list -project First\ R.xcodeproj
Command line invocation:
    /Applications/Xcode.app/Contents/Developer/usr/bin/xcodebuild -list -project "First R.xcodeproj"

Information about project "First R":
    Targets:
        First R

    Build Configurations:
        Debug
        Release

    If no build configuration is specified and -scheme is not passed then "Release" is used.

    Schemes:
        First R
If that looks like there is the potential for complexity, you have a keen eye. The Xcode build system makes it possible to build macOS, iOS, iPadOS, watchOS, and tvOS apps all from the same project so you can share common code and libraries between them all and build, debug, and test each/all of them as you wish.
Our first project is very simple, which means we can take advantage of
the information provided at the tail end of the above output and just
run build:
$ xcodebuild build

... a TON of output ...

** BUILD SUCCEEDED **

$ # now run the product
$ ./DerivedData/First\ R/Build/Products/Debug/First\ R
Hello, World!
Apple has an entire Tech Note11 you can reference to see all the other fun things you can do with the command line build system.
1.3 Up Next
Now that you’ve mastered building a basic command line app project, we’ll wire up R and use it to display the “Hello, World!” message.
Before diving in, you can use this project to explore a bit more about Swift classes and structs since we’ll eventually rely on them for many abstractions.
Remember, code examples can be found on GitHub12.
The Basics https://docs.swift.org/swift-book/LanguageGuide/TheBasics.html↩︎
iTerm 2 https://iterm2.com↩︎
Technical Note TN2339 Building from the Command Line with Xcode FAQ https://developer.apple.com/library/archive/technotes/tn2339/_index.html↩︎
SwiftR Book Examples https://github.com/hrbrmstr/swiftr-book-examples↩︎