Chapter 7 Building an R-backed SwiftUI macOS App — Part 1
As noted, unless there are Swift packages or macOS-specific functionality that is inaccessible (or just painful to take advantage of) from R, delving into the R C interface for just a command-line app is not entirely practical.
One could argue that building a native GUI application with embedded R is no longer necessary given the advent and proliferation of Shiny web applications. HTML, CSS and javascript are fairly democratized technologies at this point and virtually every connected human is used to using in-browser applications.
Shiny apps are also inherently (unless they use OS-specific capabilities) cross-platform which make them accessible to a wider audience than single-platform native apps and folks have even figured out how to put an Electron shell around Shiny apps that include a full, portable R installation. If you think a case was just made to not make R-backed native GUI apps on macOS and were expecting a mic-drop and abrupt end to this tome think again and read-on to see why you might consider making a native app instead of — or even for — a Shiny app.
7.1 The Case for Native Apps
7.1.1 The Case Against Electron
We’ll start the case for the defense with some common detractions regarding Electron-based apps.
First, Electron apps in general are bloated CPU and memory hogs since they include an entire browser plus elements of node.js along with your application. Sure, most modern systems ship with decent amounts of memory and fairly capable CPUs, but that’s not really an excuse to use something as resource consuming as Electron for modest sized applications — a description that arguably describes the vast majority of Shiny apps.
If you don’t believe Electron apps are resource hogs, see how your operating system judges them by just how much energy they use:
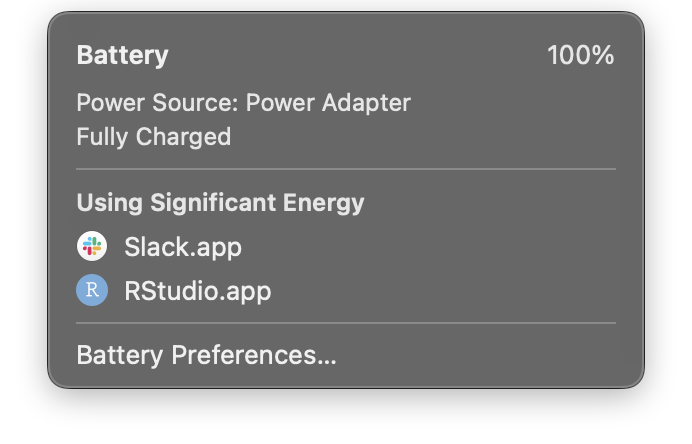
Slack is built on top of Electron and it was left idle for a while before looking at the energy profile.
Since it shows up in that view, one reason RStudio is in that list is due to every source pane being - in essence — the equivalent of a Chromium browser tab.
Energy isn’t free for humans or the environment. More energy use means more energy needs to be generated for use.
Electron apps also remove the capability for a true native app experience which incorporates all the platform user experience elements of native layout and controls. While we all may have been slowly trained to context-switch from rich, native-experience apps to the the wild west of disparate web page apps to accomplish daily tasks, that does not mean we could not be more efficient/productive and less stressed if all the tools we used met native app expectations.
7.1.2 A Case for Control
An R-backed native app doesn’t have to use embedded, easily-viewable embedded R scripts or R code snippets to work. All the R-components can be called via R’s C interface, which means your application may need the R engine to perform tasks, but the actual R code does not need to be exposed, meaning it’s now possible to ship a closed source R-based application.
While I’m a fervent advocate for open source software (OSS), that “everything is viewable and free” aspect of OSS is not a great business model for many professionals. Since your reading this book you’re likely an R and RStudio user. If you take umbrage at the first sentence of this paragraph then I’d ask you to show me the source code for the “professional” version of RStudio Desktop (or Server). There’s a reason you can’t (unless you work for RStudio as a developer) and that’s because RStudio isn’t a government that can just print money to fund itself.
A native R-backed application can enable consultants or companies to use the vast capabilities of the R ecosystem to provide to help organizations and individual solve problems they could not otherwise solve, and do so while preserving their intellectual property. Sure, licensing can make it legally painful to steal and share Shiny application code, but how often have you, yourself, violated terms of service (ToS) when it suited your needs? That ToS legal shield didn’t do much to stop you, did it?
There are other arguments to be made, but let’s dive into some code to see what it’s like to pair R with SwiftUI on macOS.
7.2 Your First SwiftUI + R Application
Hopefully you followed the guidance at the end of the previous chapter and are somewhat familiar with at least the core components of SwiftUI. If you’re a Shiny developer, the concept of “reactivity” should have been familiar for you and you likely noticed the similarities of having a application model, with a view and application code-bridge (often called a controller) to tie them together.
To demonstrate this reactivity as simply as possible, let’s build an application that takes input of a random seed and a the range to sample() from and returns the values computed by R.
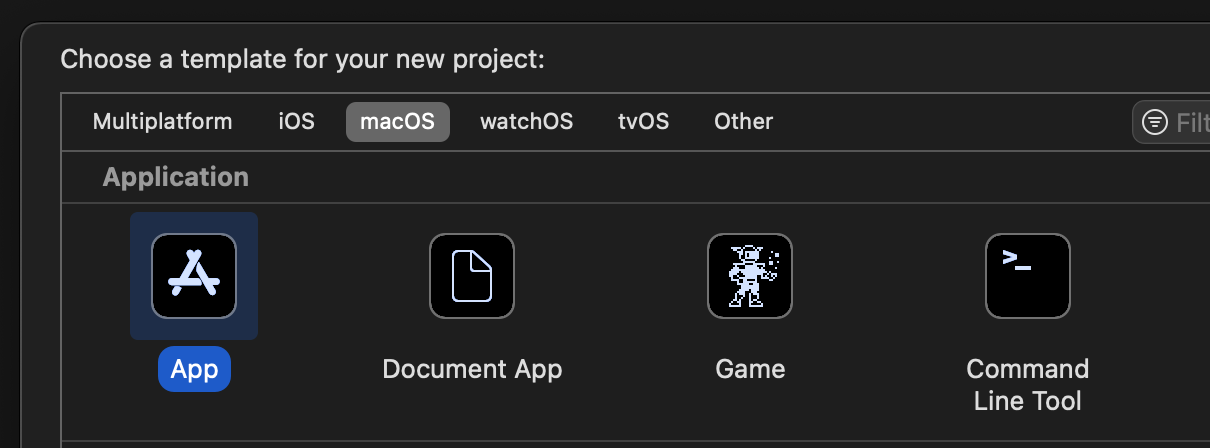
We’ll start with the default SwiftUI app project (File->New->Project) and give it the name “random”
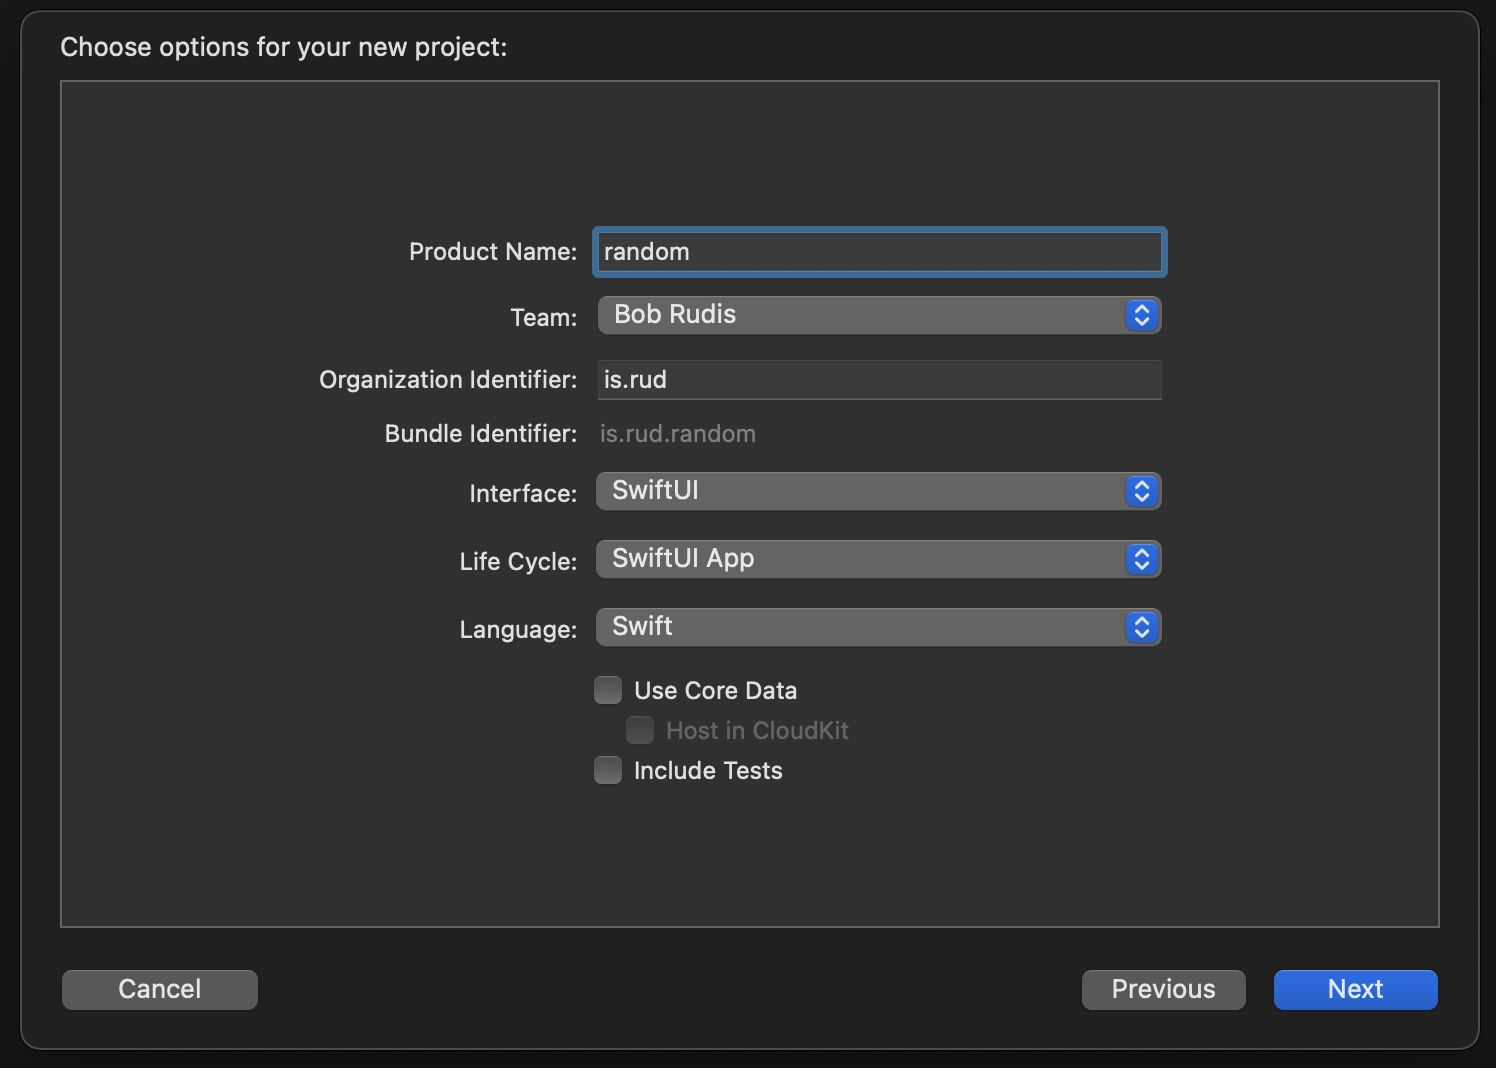
Xcode will create the project and open it with the editor on the main application “content view” source file. Since it’s open, let’s get the layout out of the way before we add in the SwiftR components.
Replace the ContentView declaration with the following:
struct ContentView: View {

  @State var randomSeed: String = "20210120"
  @State var sampleRangeStart: String = "1"
  @State var sampleRangeEnd: String = "1000"
  @State var sampledValues: String = ""

  var body: some View {
    HStack {
      VStack(alignment: .trailing) {

        HStack {
          Text("Random Seed:")
          TextField("", text: $randomSeed)
            .multilineTextAlignment(.trailing)
            .frame(width: 100)
        }

        HStack {
          Text("Range Start:")
          TextField("", text: $sampleRangeStart)
            .multilineTextAlignment(.trailing)
            .frame(width: 100)
        }

        HStack {
          Text("Range End:")
          TextField("", text: $sampleRangeStart)
            .multilineTextAlignment(.trailing)
            .frame(width: 100)
        }

        Button("Generate Values", action: {
          debugPrint("A button has been pressed")
        })

      }
      .padding()

      VStack {
        TextEditor(text: $sampledValues)
          .padding(4)
          .border(Color.primary)
          .padding()
      }
    }.frame(width: 500, height: 200)
  }
}
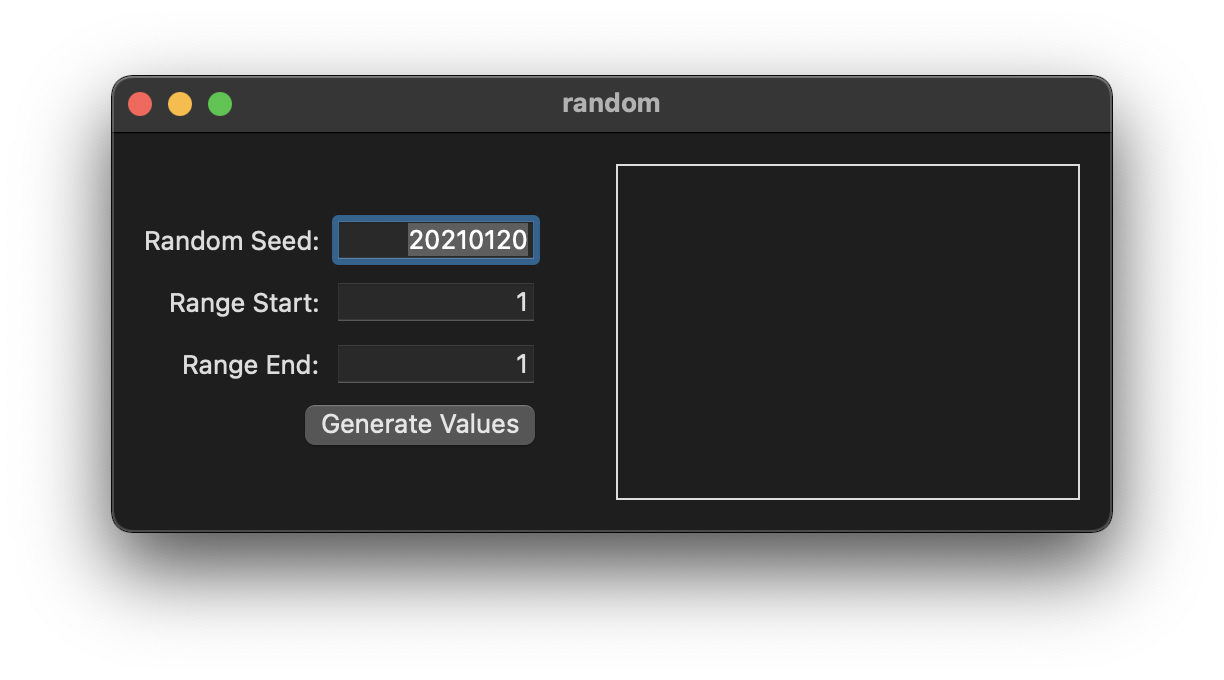
Hit “refresh” on the preview if it has paused or run the project to see the resultant layout:
If you do press the button, you’ll see text appear in the debug console.
Setup the header paths, add the R Framework, libc++, and our previously used R<->C bridge files plus the SEXP and R utility Swift source files. Make sure Xcode creates or knows about the vital bridging header. (Once you do all that, saving this project in it’s current state as a basic “template” might be worth the small effort to avoid having to do so again.)
There are newer, more documented versions of sexp-utils.swift and r-utils.swift and the R<->C bridge files here that you may want to use instead. The only real difference is that they have Swift “roxygen”-like comments which provide useful context help when you option click on them in the Xcode editor (an example of that is below).
Keen eyes will notice all input boxes are bound to String variables. I’m trying to keep this initial example as simple as possible so we’re going to live with this non-ideal setup. Introducing custom, validated, all numeric fields would add pages to this chapter and it’s more important to see how we’ll get data into and out of SwiftUI/embedded R.
If you did glance through the linked resources at the end of the previous chapter, you know that those @State variables are local to this View. We’ll be taking values from three of them and putting a value into one of them from computations in the model we’re about to build.
Create a new Swift file named RandomModel.swift and make it look like this:
import Foundation

class RandomModel : ObservableObject {

  init() {
    initEmbeddedR("/Library/Frameworks/R.framework/Resources")
  }

  /// Set Rs random seed
  ///
  /// Calls `set.seed()` with the provided seed
  ///
  /// - Parameter seed: a single value, interpreted as an integer
  func setSeed(_ seed: Int) {
    do {
      _ = try Rlang2(Rf_install("set.seed"), x: seed.protectedSEXP)
      RUNPROTECT(1)
    } catch {
    }
  }

  /// Random samples
  ///
  /// Takes a sample of the specified `size` from `rangeStart`:`rangeEnd` with replacement.
  ///
  /// The random seed is first set with `set.seed(seed = seed)` and then `sample()` is called
  /// to generate the values which are then turned into a comma-separated string with `toString()`
  /// (all in R).
  ///
  /// - Parameters:
  ///   - rangeStart: start of the range to sample from
  ///   - rangeEnd: end of the range to sample from
  ///   - size: a non-negative integer giving the number of items to choose.
  ///   - seed: the random seed to use
  func sample(rangeStart: Int, rangeEnd: Int, size: Int, seed: Int) -> String {
    setSeed(seed)
    let rCode = "toString(sample(x = \(rangeStart):\(rangeEnd), size = \(size), replace = TRUE))"
    let res = safeSilentEvalParseString(rCode)
    R_gc()
    return(String(res[0]) ?? "")
  }

  deinit { Rf_endEmbeddedR(0) }

}
You’ll notice there are highly structured comments (something which was left off in previous chapters for brevity). Besides documenting the functionality and contract the function adheres to in-source, those structured comments are also parsed and used by Xcode when you option-click on identifiers in source files, like this:
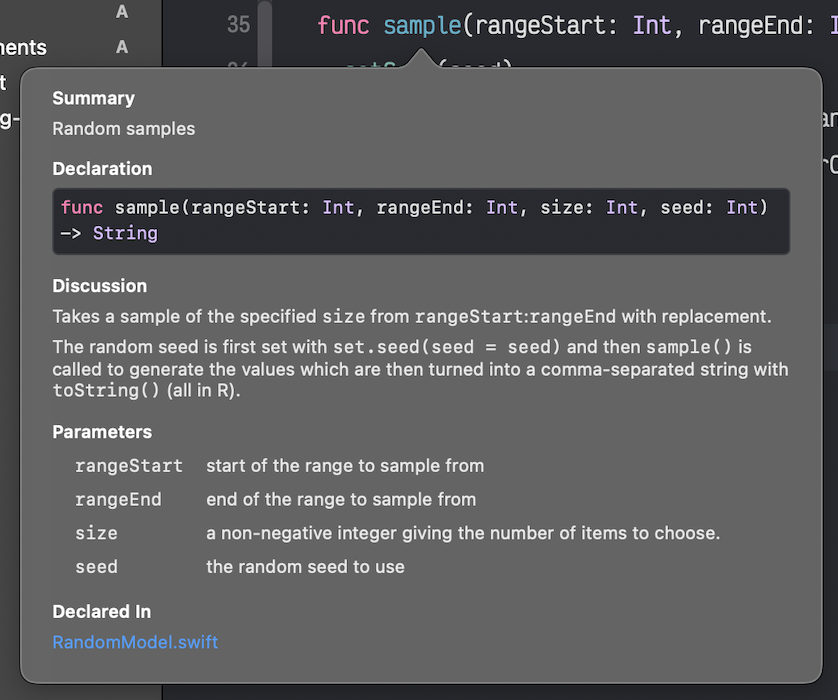
We made a Swift wrapper for set.seed() (mostly for practice) and used Swift string interpolation to make a small bit of R code that we parse and evaluate to get the computed sample.
Back in ContentView.swift, replace the Button code with the following:
Button("Generate Values", action: {
  sampledValues = randomApp.sample(
    rangeStart: Int(sampleRangeStart) ?? 1,
    rangeEnd: Int(sampleRangeEnd) ?? 100,
    size: 20,
    seed : Int(randomSeed) ?? 20210120
  )
})
Again, we’re not doing any validation beyond providing legitimate values in the event we enter something besides numbers solely for brevity.
Build and run the project, then press the button. You should see this if you haven’t modified the defaults:
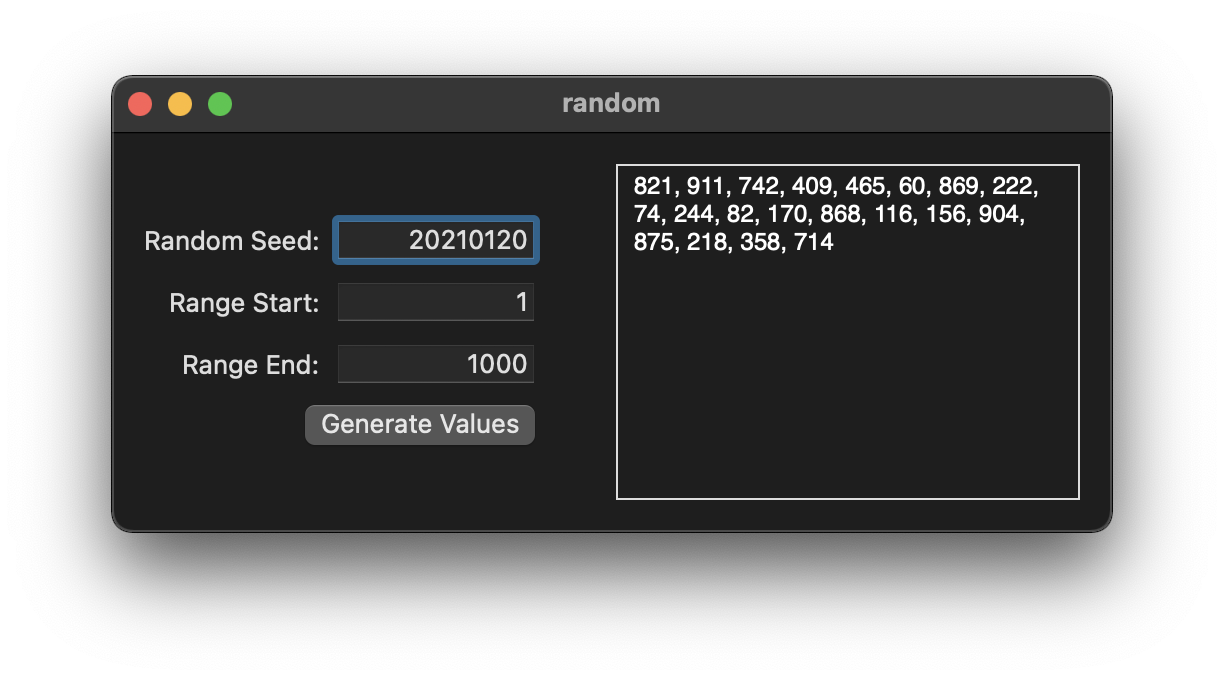
Congratulations! You’ve built your first R-backed SwiftUI application!
7.3 Up Next
This was a toy application but it is usable and can be extended to build utility applications, provided they’re text-only or you compose graphics from R computations in SwiftUI-proper. We’ll build a more complex application with deeper R integration.
Before diving in, take a look at this article which presents one method of adding field validation to SwiftUI TextFields and consider modifying the application to validate user input.